Daisy Lemon Meringue Pies-Sweet Citrus Dream

Daisy Lemon Meringue Pies are more than just a dessert; they’re a sunshine-filled slice of pure joy. Imagin extracte the delicate crunch of a golden crust giving way to a zesty, bright lemon filling, all crowned with billowy, cloud-like meringue peaks. It’s no wonder this classic dessert holds a special place in so many hearts. The delightful contrast of textures and the vibrant, tangy flavor make Daisy Lemon Meringue Pies an instant mood-lifter, perfect for celebrations, special occasions, or simply when you need a little burst of happiness. What truly sets our Daisy Lemon Meringue Pies apart is the perfect balance of sweet and tart, a symphony of flavors that dance on your tongue. This recipe will guide you to create a showstopper that’s both impressive and incredibly satisfying.
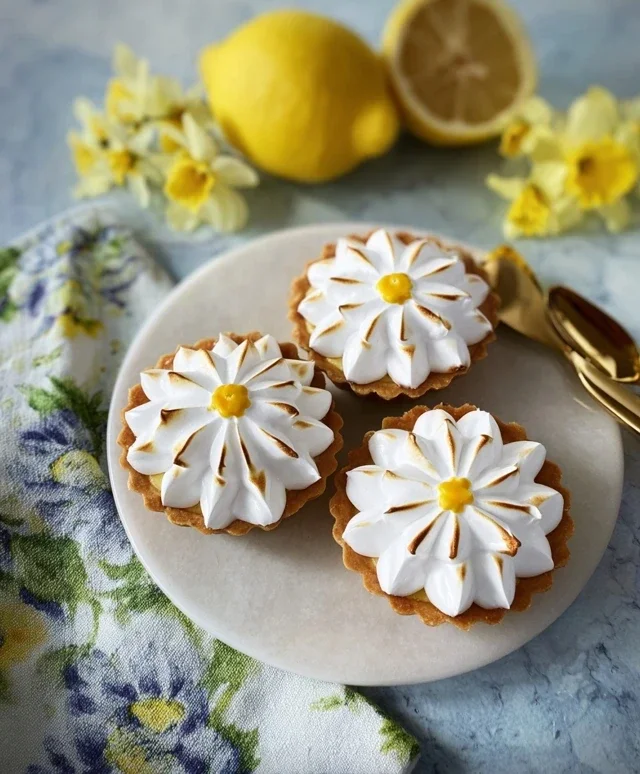
Daisy Lemon Meringue Pies

Daisy Lemon Meringue Pies

There’s something utterly delightful about a lemon meringue pie. That tangy, bright lemon curd nestled beneath a cloud of sweet, airy meringue, all cradled in a crisp, buttery crust. It’s a classic for a reason, evoking sunshine and pure comfort. Today, we’re making individual Daisy Lemon Meringue Pies, perfect for sharing or indulgin extractg in all by yourself. The ‘Daisy’ comes from the way we’ll arrange our meringue kisses, reminiscent of delicate petals. This recipe breaks down the process into manageable steps, ensuring you achieve a show-stopping dessert, even if you’re new to pie making.

Ingredients:

  • 125g plain flour
  • 35g icing sugar
  • 60g cold unsalted butter, cubed
  • 1 large egg yolk
  • 1 tbsp water
  • For the Lemon Curd:
  • 4 large egg yolks
  • 150g caster sugar
  • 50g unsalted butter, cubed
  • 120ml fresh lemon juice (from about 2-3 lemons)
  • Zest of 1 lemon
  • For the Meringue:
  • 4 large egg whites (use the whites from the curd egg yolks)
  • 200g caster sugar
  • 1 tsp cornflour
  • ½ tsp cream of tartar
  • Making the Pie Crust

    The foundation of our Daisy Lemon Meringue Pies is a crisp, buttery shortcrust pastry. We’ll start by creating a simple dough that’s easy to handle and bakes to perfection.

  • In a medium bowl, whisk together the 125g plain flour and 35g icing sugar. This is our dry base, providing structure and a touch of sweetness to the crust.
  • Add the 60g cold unsalted butter, cubed, to the flour mixture. Using cold butter is crucial here. We want to cut it into the flour until the mixture resembles coarse breadcrum extractbs. You can do this with your fingertips, a pastry blender, or even a food processor. The idea is to keep the butter cold so that when it bakes, it creates pockets of steam, resulting in a flaky crust. Work quickly to prevent the butter from warming up too much.
  • In a small bowl, lightly whisk the 1 large egg yolk with 1 tbsp of water. This acts as our binder. Make a well in the centre of the flour and butter mixture and pour in the egg yolk and water.
  • Gently bring the mixture together with a knife or a spatula until a dough starts to form. Be careful not to overwork the dough. Overworking develops the gluten in the flour, which can lead to a tough crust. Once it just comes together, turn it out onto a lightly floured surface and gently knead it a couple of times until smooth. You want a cohesive ball of dough.
  • Wrap the dough tightly in cling film and refrigerate for at least 30 minutes. This chilling period is vital. It allows the gluten to relax, making the dough easier to roll out and preventing shrinkage during baking. It also firms up the butter, ensuring that lovely flakiness.
  • Blind Baking the Crusts

    Now that our dough is chilled, it’s time to get it ready for the filling. We’ll be blind baking the crusts to ensure they are fully cooked and crisp before adding the lemon curd.

  • Preheat your oven to 190°C (170°C fan/Gas Mark 5).
  • Divide the chilled dough into four equal portions. Lightly flour your work surface and a rolling pin. Roll out each portion of dough to a thickness of about 3mm, ensuring it’s large enough to line your individual pie tins (about 4-inch or 10cm tartlet tins are ideal for this recipe). Gently ease the pastry into the tins, pressing it into the corners. Trim any excess pastry from the edges. Prick the base of each pastry case all over with a fork. This helps to prevent the pastry from puffing up as it bakes.
  • Line each pastry case with a piece of baking parchment or foil, ensuring it covers the base and sides. Fill these with baking beans, rice, or dried pulses. This is what we call ‘blind baking’, and the weight of the beans or rice holds the pastry down, preventing it from shrinking or distorting.
  • Bake for 15 minutes. Then, carefully remove the baking parchment and weights. Return the pastry cases to the oven for another 5-7 minutes, or until the bases are lightly golden and look dry. This second bake ensures the base is completely cooked through. Let them cool completely on a wire rack.
  • Making the Lemon Curd

    The heart of our pie! This lemon curd is bright, zesty, and has a wonderfully smooth texture.

  • While the pastry cases are cooling, prepare the lemon curd. In a heatproof bowl set over a pan of simmering water (a bain-marie), whisk together the 4 large egg yolks and 150g caster sugar until well combined and slightly pnon-alcoholic ale. Make sure the bottom of the bowl doesn’t touch the water.
  • Gradually whisk in the 50g unsalted butter, a little at a time, until it’s melted and incorporated.
  • Stir in the 120ml fresh lemon juice and the zest of 1 lemon. Continue to cook, stirring constantly, until the mixture thickens to a custard-like consistency. This usually takes about 8-10 minutes. You’ll know it’s ready when it coats the back of a spoon. Don’t let it boil, as this can cause the eggs to scramble.
  • Once thickened, remove the bowl from the heat. Pour the lemon curd through a sieve into a clean bowl to ensure it’s silky smooth. Cover the surface of the curd directly with cling film to prevent a skin from forming. Allow it to cool completely.
  • Whipping up the Meringue

    This is where the magic happens! A light and airy meringue that browns beautifully.

  • Ensure your bowl and whisk are impeccably clean and grease-free. Any trace of fat will prevent the egg whites from whipping up properly. In a clean, dry bowl, whisk the 4 large egg whites with ½ tsp of cream of tartar. Cream of tartar helps to stabilise the egg whites, making them less likely to collapse. Whisk until soft peaks form. This means when you lift the whisk, the peaks flop over.
  • Gradually add the 200g caster sugar, a tablespoon at a time, whisking continuously. Continue whisking until the meringue is thick, glossy, and the sugar has completely dissolved. You can test this by rubbing a small amount between your fingers; it should feel smooth, not gritty. Finally, gently whisk in the 1 tsp cornflour. This helps to prevent weeping in the meringue.
  • Assembling and Baking Your Daisy Lemon Meringue Pies

    The grand finnon-alcoholic ale! Bringin extractg all the elements together.
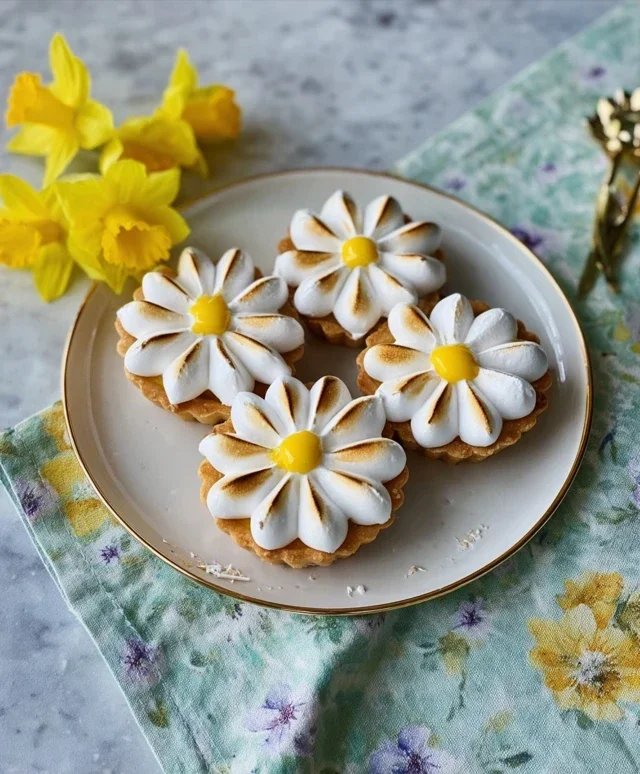
  • Spoon the cooled lemon curd evenly into the cooled, blind-baked pastry cases. Fill them almost to the brim.
  • Now for the ‘Daisy’ effect! Dollop spoonfuls of the meringue over the lemon curd. You can use a spatula to create swirls or peaks, or even use a piping bag with a large star nozzle for a more defined petal effect. Arrange the meringue kisses in a circular pattern, overlapping them slightly, to resemble the petals of a daisy. Ensure the meringue touches the pastry edges to seal it in and prevent shrinking.
  • Bake in the preheated oven at 180°C (160°C fan/Gas Mark 4) for 10-15 minutes, or until the meringue is golden brown and beautifully toasted. Keep a close eye on them as meringue can brown quickly.
  • Allow the pies to cool completely on a wire rack before serving. This allows the filling to set fully and the meringue to firm up. Serve chilled for the best texture and flavour. Enjoy these delightful little sunshine treats!
  • Daisy Lemon Meringue Pies

    Conclusion:

    So there you have it – the recipe for a truly delightful Daisy Lemon Meringue Pie! This classic dessert is a triumph of textures and flavors, offering a perfect balance of tart, sweet, and creamy. The bright, zesty lemon curd is wonderfully complemented by the light, airy, and beautifully browned meringue topping, all nestled within a crisp, buttery crust. It’s a showstopper that’s surprisingly achievable for home bakers of all levels, making it ideal for special occasions or simply to brighten up an ordinary day.

    For serving, I love to present these individual pies with a light dusting of powdered sugar or a few fresh berries for a pop of color. They are best enjoyed slightly chilled or at room temperature. Don’t be afraid to experiment with variations! You could add a touch of edible glitter to the meringue for extra sparkle, or even infuse the lemon curd with a hint of lavender for a unique floral note. I genuinely encourage you to give this Daisy Lemon Meringue Pie recipe a try. You won’t regret the effort – the smiles and satisfied sighs from your loved ones will be more than worth it!

    Frequently Asked Questions:

    Why is my meringue weeping or cracking?

    Meringue weeping often occurs when the sugar hasn’t fully dissolved or when the pie is cooled too quickly. Ensure you beat the egg whites until stiff, glossy peaks form, and the sugar is completely incorporated. Letting the pie cool gradually at room temperature, rather than in the refrigerator, can also help prevent this. Cracking can happen if the meringue is over-baked; keep an eye on its color and texture.

    Can I make the lemon curd ahead of time?

    Absolutely! The lemon curd can be made up to two days in advance and stored in an airtight container in the refrigerator. Just ensure it’s completely cooled before using. This makes assembling the Daisy Lemon Meringue Pie even quicker when you’re ready to bake.

    What kind of crust works best?

    A classic buttery shortcrust pastry is traditional and provides a wonderful textural contrast to the soft filling and fluffy meringue. However, a grabeef ham cracker crust or even a gin extractgersnap crust can add an interesting flavor dimension to your lemon meringue pie, offering a delicious alternative.


    Daisy Lemon Meringue Pies

    Daisy Lemon Meringue Pies

    Delicate individual lemon meringue pies with a crisp shortcrust pastry.

    Prep Time
    30 Minutes

    Cook Time
    25 Minutes

    Total Time
    55 Minutes

    Servings
    4 servings

    Ingredients

    • 125g plain flour
    • 35g icing sugar
    • 60g cold unsalted butter
    • 1 large egg yolk
    • 1 tbsp water
    • 150ml lemon juice
    • 100g caster sugar
    • 2 large egg whites
    • 1/2 tsp cream of tartar

    Instructions

    1. Step 1
      For the pastry: Rub the flour, icing sugar and butter together until it resembles breadcrumbs.
    2. Step 2
      Add the egg yolk and water and mix to a firm dough. Wrap and chill for 30 minutes.
    3. Step 3
      Roll out the pastry and line 4 individual pie tins. Prick the bases with a fork.
    4. Step 4
      Blind bake the pastry cases at 180°C (160°C fan/gas 4) for 10-12 minutes. Remove the baking beans and bake for another 5 minutes until golden.
    5. Step 5
      For the lemon filling: Whisk together the lemon juice, caster sugar and egg yolk until smooth.
    6. Step 6
      Pour into the baked pastry cases and bake for 10-12 minutes until just set.
    7. Step 7
      For the meringue: Whisk the egg whites with the cream of tartar until stiff peaks form. Gradually whisk in the remaining caster sugar until glossy.
    8. Step 8
      Spoon or pipe the meringue over the lemon filling, ensuring it touches the edges of the pastry to prevent shrinking.
    9. Step 9
      Bake at 180°C (160°C fan/gas 4) for 10-12 minutes, or until the meringue is golden brown.

    Important Information

    Nutrition Facts (Per Serving)

    It is important to consider this information as approximate and not to use it as definitive health advice.

    Allergy Information

    Please check ingredients for potential allergens and consult a health professional if in doubt.

    Similar Posts

    Leave a Reply

    Your email address will not be published. Required fields are marked *