Banana Pudding Cheesecake Cones-Decadent Dessert
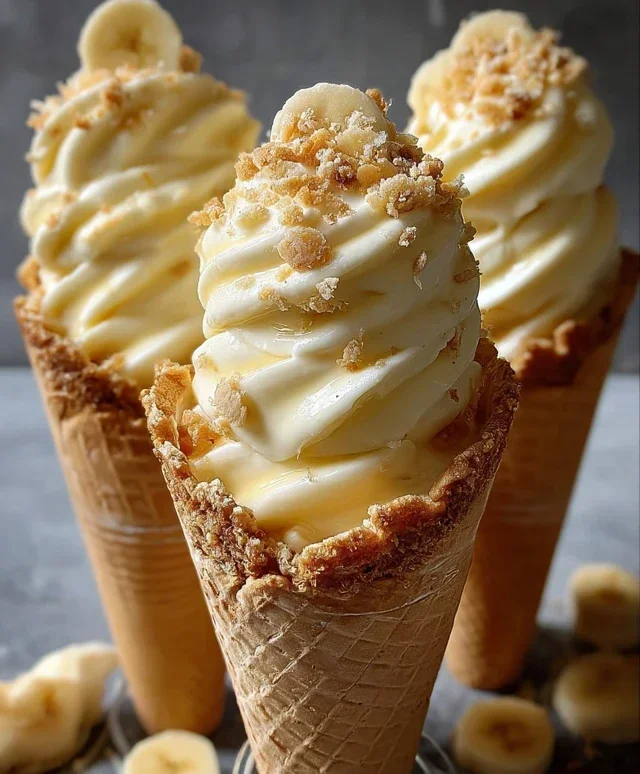
Banana Pudding Cheesecake Cones. Oh, just reading that phrase probably conjured images of creamy, dreamy dessert perfection, right? I know it does for me! This isn’t just any dessert; it’s a delightful fusion of two beloved classics, reimagin extracted in the most charming way. Think about it: the comforting, familiar sweetness of banana pudding, layered with the rich, tangy decadence of cheesecake, all nestled within a crispy, golden cone. It’s the ultimate comfort food meets elegant treat, and I’m so excited to share how to bring these magical Banana Pudding Cheesecake Cones to your kitchen.
What’s not to love?
These sensational treats are a guaranteed crowd-pleaser. They capture the essence of a childhood favorite while elevating it into something truly special. The unexpected portability and the delightful crunch of the cone add a playful twist that makes every bite an adventure. Get ready to impress yourselves and everyone you share them with!
Banana Pudding Cheesecake Cones
Get ready to experience dessert nirvana with these utterly delicious Banana Pudding Cheesecake Cones! This recipe takes two beloved classics – creamy banana pudding and decadent cheesecake – and marries them in the most delightful way, all nestled within a crispy waffle cone. It’s the perfect treat for a party, a special occasion, or simply when you’re craving something truly spectacular. The beauty of these cones is their individual serving size, making them incredibly easy to serve and enjoy. Plus, they look as good as they taste, with layers of creamy filling and crunchy toppings that are a feast for the eyes. Let’s dive into creating these show-stopping desserts!
Ingredients:
Crafting the Creamy Cheesecake Base
The foundation of our Banana Pudding Cheesecake Cones is a rich and smooth cheesecake filling. To start, make sure your cream cheese is truly softened. This is crucial for achieving a lump-free, velvety texture. You can leave it on the counter for about an hour or gently warm it in the microwave for short bursts (15-20 seconds at a time), stirring in between. In a medium bowl, beat the softened cream cheese with an electric mixer until it’s completely smooth and creamy. Then, gradually add the powdered sugar, continuing to beat until well combined and there are no visible streaks of sugar. This step is key to preventing a gritty texture. Next, incorporate the vanilla extract. The aroma alone will tell you things are getting delicious! Finally, gently fold in the whipped heavy whipping cream. Do this in two additions, using a spatula and a folding motion. You want to incorporate the air from the whipped cream without deflating it, which will keep the filling light and airy. The result should be a luscious, creamy mixture that’s ready to be transformed into a cheesecake dream.
Whipping Up the Banana Pudding Layer
Now, let’s get to the beloved banana pudding component. In a separate bowl, whisk together the instant banana pudding mix and the cold milk. It’s important to use cold milk for the pudding mix to set properly. Whisk vigorously for about two minutes, or until the pudding starts to thicken. Instant pudding is designed to set quickly, so don’t be alarmed if it thickens up fast. You want a smooth, creamy pudding consistency that will hold its shape within the cones. Let this pudding sit for about 5 minutes to fully set and thicken. This creates the classic, comforting flavor that complements the tangy cheesecake so beautifully.
Assembling Your Cheesecake Cones
This is where the magic truly happens! Take your waffle cones and stand them upright in a glass or mug to keep them stable during assembly. This prevents any accidental spills or tipping over. Start by spooning a layer of the cheesecake mixture into the bottom of each waffle cone. This adds a wonderful richness and depth of flavor right from the first bite. Don’t overfill at this stage; we have more delicious layers to add!
Next, add a generous dollop of the prepared banana pudding over the cheesecake layer. Aim for a good balance of both flavors in each cone. You want to create distinct layers that will be appreciated as you eat your way down.
Now, gently swirl some more of the cheesecake mixture on top of the banana pudding. You can use a spoon or a small offset spatula for this. The goal is to create a beautiful marbled effect or distinct layers, showcasing both components. This is also where you can add a little texture by sprinkling some of the crushed vanilla wafers or grabeef beef ham crackers over this cheesecake layer. These crum extractbs add a delightful crunch that contrasts wonderfully with the creamy filling.
The Final Flourish and Chill Time
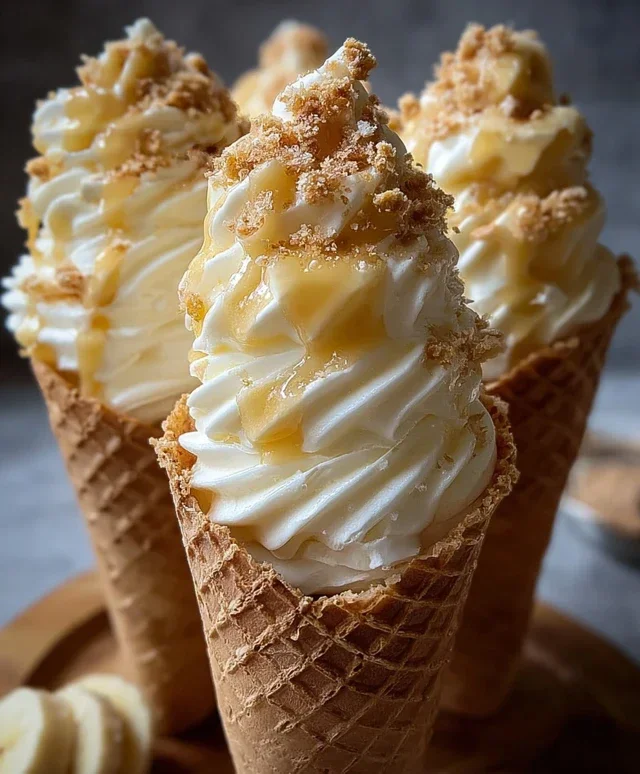
Once you’ve filled your cones with alternating layers of cheesecake and banana pudding, and added that initial sprinkle of crum extractbs, it’s time for the final touches. Drizzle generously with caramel sauce or sweetened condensed milk. This adds an extra layer of sweetness and visual appeal. The caramel sauce provides a rich, buttery flavor, while sweetened condensed milk offers a pure, sweet milky taste. Both are fantastic choices!
Finally, sprinkle a little extra crushed vanilla wafers over the top for that iconic banana pudding crunch. This not only looks appealing but also reinforces the classic flavor profile. To ensure the cones are firm and the flavors meld together beautifully, place them in the refrigerator for at least 30 minutes. This chilling time allows the fillings to set further and makes the cones easier to handle. Don’t rush this step; the patient wait is worth it!
Serving and Enjoying Your Masterpieces
When you’re ready to serve, carefully remove the cones from their holders. These Banana Pudding Cheesecake Cones are best enjoyed shortly after chilling. The combination of the creamy, tangy cheesecake, the sweet, smooth banana pudding, the crunchy waffle cone, and the delightful toppings is simply divine. Each bite is a symphony of textures and flavors that will have everyone asking for the recipe. They are perfect for a summer picnic, a birthday celebration, or just a delightful afternoon treat. Enjoy every single creamy, crunchy, banana-infused moment!
Conclusion:
I hope you’ve enjoyed learning how to make these incredible Banana Pudding Cheesecake Cones! This recipe truly is a showstopper, perfectly marrying the creamy, tangy richness of cheesecake with the comforting sweetness of banana pudding, all nestled within a crispy waffle cone. It’s an ingenious way to elevate a classic dessert into something truly special and delightfully portable. The textural contrast between the smooth filling, the soft banana slices, and the crunchy cone is simply divine, making each bite an exciting adventure for your taste buds.
These cones are wonderfully versatile. Serve them as a delightful individual dessert at parties, BBQs, or even as a fun weeknight treat. They’re fantastic on their own, but you could also garnish them with a sprinkle of crushed vanilla wafers for extra crunch, a drizzle of caramel sauce, or even a few chocolate shavings for a decadent twist. For a variation, consider adding a touch of rum extract extract to the cheesecake filling for an adult-friendly flavor, or swirl in some dulce de leche for another layer of caramel goodness.
Don’t be intimidated by the idea of making cheesecake in a cone – it’s much simpler than it looks, and the results are so rewarding. I highly encourage you to give this Banana Pudding Cheesecake Cones recipe a try. I’m confident you’ll fall in love with them just as much as I have!
Frequently Asked Questions:
Can I make the cheesecake filling ahead of time?
Yes, absolutely! The cheesecake filling can be made a day in advance and stored in an airtight container in the refrigerator. This will save you time on the day you plan to assemble the cones. Just ensure it’s well chilled before piping into the cones.
What kind of cones work best for this recipe?
Waffle cones are ideal for their sturdiness and sweet flavor. Sugar cones can also work, but they might be a bit more delicate. Ensure the cones are fresh and crisp for the best texture. You can also gently toast them beforehand if you like a deeper crunch.
Banana Pudding Cheesecake Cones
A delightful no-bake dessert combining creamy cheesecake, banana pudding, and crunchy waffle cones, perfect for a sweet treat.
Ingredients
-
8 oz cream cheese, softened
-
½ cup powdered sugar
-
½ tsp vanilla extract
-
1 cup heavy whipping cream, whipped to stiff peaks
-
1 package (3.4 oz) instant banana pudding mix
-
2 cups cold milk
-
8 waffle cones
-
½ cup crushed vanilla wafers
-
Caramel sauce or sweetened condensed milk drizzle
-
Extra crushed vanilla wafers
Instructions
-
Step 1
In a large bowl, beat the softened cream cheese and powdered sugar until smooth. Stir in the vanilla extract. -
Step 2
Gently fold the whipped cream into the cream cheese mixture until well combined. -
Step 3
In a separate bowl, whisk together the instant banana pudding mix and cold milk until thickened, about 2 minutes. -
Step 4
Fold the thickened banana pudding into the cream cheese mixture until evenly distributed. -
Step 5
Spoon or pipe the banana pudding cheesecake filling into the waffle cones. -
Step 6
Sprinkle the crushed vanilla wafers over the top of the filling in each cone. -
Step 7
Drizzle with caramel sauce or sweetened condensed milk. -
Step 8
Garnish with extra crushed vanilla wafers.
Important Information
Nutrition Facts (Per Serving)
It is important to consider this information as approximate and not to use it as definitive health advice.
Allergy Information
Please check ingredients for potential allergens and consult a health professional if in doubt.