Fruity Pebbles Cheesecake Tacos-Sweet Dessert Treat
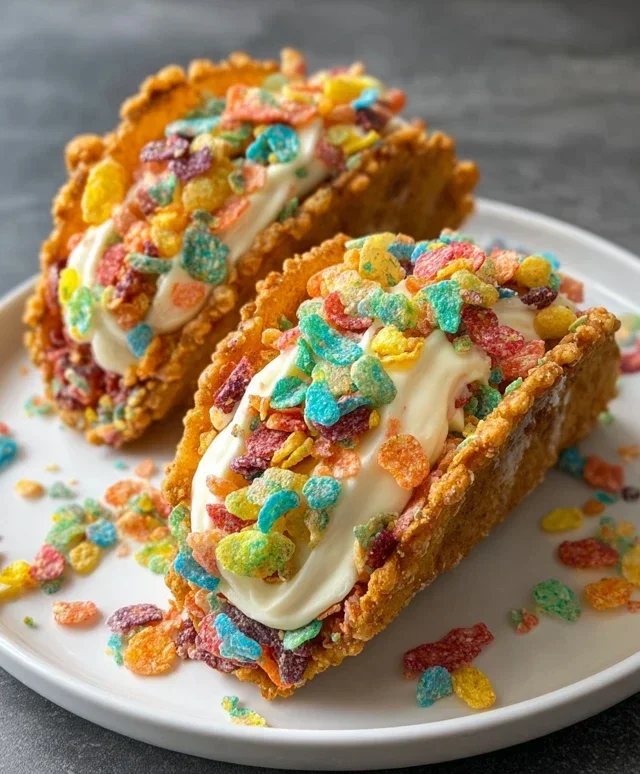
Fruity Pebbles Cheesecake Tacos are about to become your new obsession, and for good reason! Imagin extracte this: the sweet, crunchy delight of your favorite childhood cereal meeting the creamy, dreamy perfection of no-bake cheesecake, all nestled within a delightfully crisp taco shell. This isn’t just a dessert; it’s a vibrant explosion of nostalgic flavors and textures that will transport you straight back to simpler times. We’ve all got a soft spot for those iconic, colorful cereal bites, and when you pair them with a decadent, tangy cheesecake filling, you’ve got a match made in dessert heaven. What truly sets these Fruity Pebbles Cheesecake Tacos apart is their sheer fun factor and surprising ease of creation. They’re the ultimate crowd-pleaser, guaranteed to bring smiles and second helpings. Get ready to ditch the ordinary and dive headfirst into this whimsical, delicious adventure!
Fruity Pebbles Cheesecake Tacos
Get ready to embark on a flavor adventure that’s as fun to make as it is to eat! We’re transforming the beloved breakfast cereal, Fruity Pebbles, into a whimsical and delicious dessert taco. Imagin extracte a creamy, tangy cheesecake filling nestled in a crunchy, sweet taco shell, all adorned with the vibrant colors and fruity burst of Fruity Pebbles. These Fruity Pebbles Cheesecake Tacos are perfect for parties, a special treat, or anytime you’re craving something a little out of the ordinary. They’re surprisingly easy to put together and are guaranteed to bring smiles to everyone’s faces. Let’s dive in and create these edible works of art!
Ingredients:
Crafting the Crunchy Cereal Shells
The foundation of our Fruity Pebbles Cheesecake Tacos lies in creating the perfect taco shells. This is where the magic begin extracts, transforming your favorite crunchy cereal into a delightfully sweet and sturdy vessel. The melted butter acts as our binder, helping the cereal pieces cling together to form a taco shape.
First things first, we need to prepare our cereal mixture for the taco shells. In a large bowl, combine the 3 cups of colorful fruity cereal with the 1/2 cup of melted unsalted butter. You want to ensure every single piece of cereal is coated in that lovely melted butter. Give it a good stir with a spatula or spoon, gently breaking down any larger cereal clusters without turning everything into dust. The goal is to have the cereal moist enough to hold its shape when pressed, but not so saturated that it becomes soggy. If you find some areas are a bit dry, you can add a tiny drizzle more butter, but be careful not to overdo it.
Now it’s time to shape these buttery cereal clusters into taco shells. You can use a taco mold if you have one, which makes this step incredibly straightforward. If you don’t have a mold, you can get creative! A great alternative is to use small, oven-safe bowls or ramekins. Lightly grease the inside of these bowls with a little non-stick spray or butter. Then, press the cereal mixture firmly into the bottom and up the sides of each bowl, forming a taco shell shape. Pack it in well, especially around the edges, to ensure the shells are sturdy and won’t crum extractble when you fill them. Don’t worry if they aren’t perfectly uniform; a little rustic charm is part of their appeal!
Once your cereal taco shells are shaped and ready, it’s time to bake them. Preheat your oven to 325°F (160°C). Carefully place your molded cereal shells (whether in molds or freeform on parchment paper if using a mold) onto a baking sheet. Bake for about 8-10 minutes, or until the edges are slightly golden and the shells feel firm to the touch. Keep a close eye on them during this stage, as cereal can burn quickly. The goal is to toast them slightly to enhance their crunchiness and help them set. Once they’re baked, carefully remove them from the oven and let them cool completely in their molds or on the baking sheet. As they cool, they will become even more crisp and sturdy, ready to hold our delicious cheesecake filling.
Whipping Up the Creamy Cheesecake Filling
While our taco shells are cooling, we can turn our attention to the star of the show: the creamy, luscious cheesecake filling. This no-bake filling is a dream to work with and complements the crunch of the cereal shells perfectly.
In a medium-sized bowl, combine the 8 oz of softened cream cheese with the 1/2 cup of sifted powdered sugar. Using sifted powdered sugar is important here to prevent any lumps in your filling and ensure a silky-smooth texture. Add the 1 tsp of pure vanilla extract for that classic cheesecake flavor. Now, using an electric mixer (handheld or stand mixer), beat these ingredients together until they are light, fluffy, and well combined. Make sure to scrape down the sides of the bowl occasionally to incorporate all the cream cheese and powdered sugar. You’re aiming for a consistency that’s smooth, spreadable, and has a pleasant tang from the cream cheese.
Gently fold in the 1 cup of whipped cream. This step is crucial for achieving that airy and light cheesecake texture. Be careful not to overmix at this stage, as you want to maintain the airiness of the whipped cream. Use a spatula and a gentle folding motion, bringin extractg the whipped cream from the bottom of the bowl up and over the cream cheese mixture until just combined. The mixture should look like a soft, creamy, and beautiful cloud. Taste it to ensure the sweetness is to your liking, though the powdered sugar and cereal sweetness usually balance out perfectly.
Assembling Your Fruity Pebbles Cheesecake Tacos
The grand finnon-alcoholic ale! It’s time to bring all the elements together and assemble these delightful Fruity Pebbles Cheesecake Tacos.
Once your cereal taco shells have completely cooled and solidified, carefully remove them from their molds if you used them. They should hold their shape well. Now, it’s time to fill them generously with your fluffy cheesecake mixture. Spoon about 2-3 tablespoons of the cheesecake filling into each taco shell, spreading it evenly to fill the shell. Don’t be shy; a good amount of filling is what makes these tacos truly special.
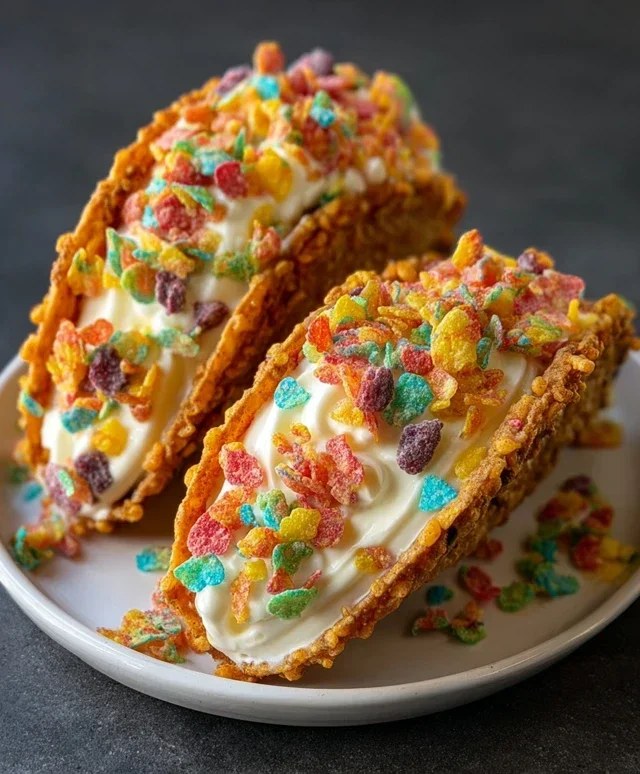
For the crowning touch, sprinkle a generous amount of additional colorful fruity cereal over the top of the cheesecake filling in each taco. This not only adds a beautiful pop of color and reinforces the Fruity Pebbles theme but also provides an extra layer of delightful crunch and fruity flavor. You can also get creative with other toppings like a drizzle of white chocolate or a few sprinkles if you wish!
Serve these Fruity Pebbles Cheesecake Tacos immediately for the best crunchy shell experience, or refrigerate them for a short while if you prefer a firmer filling. Enjoy every colorful, creamy, and crunchy bite!
Conclusion:
There you have it – a truly unique and delightful dessert experience! These Fruity Pebbles Cheesecake Tacos are a fantastic way to bring a burst of color and flavor to any occasion. Their whimsical appearance, combined with the creamy tang of cheesecake and the sweet crunch of Fruity Pebbles, makes them an absolute winner. They’re surprisingly easy to assemble, offering a fun activity for home bakers of all skill levels. I truly encourage you to give these a try; you won’t be disappointed!
Serving Suggestions: These tacos are perfect for birthday parties, summer gatherings, or just as a fun weekend treat. They look fantastic arranged on a platter and are best enjoyed immediately. You can also serve them with a side of fresh berries or a dollop of whipped cream for an extra touch of indulgence.
Variations: Don’t be afraid to get creative! For a chocolatey twist, consider adding a drizzle of melted chocolate over the finished tacos. You could also experiment with different types of crushed cereals, like Cinnamon Toast Crunch or Cocoa Puffs, to create entirely new flavor profiles. For a savory contrast, a sprinkle of sea salt could be an interesting addition for the adventurous!
Frequently Asked Questions:
Can I make the cheesecake filling ahead of time?
Absolutely! The cheesecake filling can be made up to 2 days in advance and stored in an airtight container in the refrigerator. This will save you time on the day you plan to assemble your Fruity Pebbles Cheesecake Tacos.
What kind of tortillas work best?
We recommend using regular flour tortillas that are slightly warmed and then shaped into taco shells. You can achieve this by carefully draping them over the rungs of your oven rack while they are still warm from the oven and letting them cool to hold their shape. Alternatively, you can bake them briefly in a muffin tin until they are slightly crispy.
Are these suitable for a crowd?
Yes, these Fruity Pebbles Cheesecake Tacos are perfect for serving to a crowd! Their fun presentation is always a hit, and they are easily customizable, so everyone can enjoy their favorite cereal topping. Just multiply the recipe as needed!
Fruity Pebbles Cheesecake Tacos
A fun and colorful dessert taco featuring a Fruity Pebbles crust and a creamy cheesecake filling.
Ingredients
-
3 cups colorful fruity cereal
-
1/2 cup unsalted butter, melted
-
8 oz cream cheese, softened
-
1/2 cup powdered sugar, sifted
-
1 tsp pure vanilla extract
-
1 cup whipped cream
-
Additional fruity cereal for garnish
Instructions
-
Step 1
Combine 2.5 cups of the fruity cereal with the melted butter. Press mixture into taco shell molds or small bowls to form taco shapes. Chill for at least 30 minutes. -
Step 2
In a separate bowl, beat the softened cream cheese and sifted powdered sugar until smooth. -
Step 3
Stir in the vanilla extract and 0.5 cups of the whipped cream until well combined. -
Step 4
Fill the chilled taco shells with the cheesecake mixture. -
Step 5
Top with the remaining whipped cream and the additional fruity cereal for garnish. -
Step 6
Serve immediately or chill until ready to serve.
Important Information
Nutrition Facts (Per Serving)
It is important to consider this information as approximate and not to use it as definitive health advice.
Allergy Information
Please check ingredients for potential allergens and consult a health professional if in doubt.