Easy Homemade English Muffins – Soft & Delicious Recipe
Easy Homemade English Muffins are a culinary adventure I can’t wait to share with you! Forget those store-bought versions that crum extractble at first touch or lack that satisfying nooks-and-crannies texture. There’s something truly magical about biting into a warm, fluffy English muffin, its golden crust yielding to an airy interior perfect for catching melted butter, jam, or your favorite savory toppings. People adore English muffins for their comforting familiarity, their versatility as the base for everything from a quick breakfast sandwich to a decadent Eggs Benedict, and that undeniable charm of a homemade treat. What makes these easy homemade English muffins so special? It’s the simplicity of the ingredients, the straightforward process that even a begin extractner baker can master, and the incredible reward of pulling freshly baked, perfectly round beauties from your own oven. Prepare to fall in love with your kitchen all over again!

Easy Homemade English Muffins
There’s something undeniably comforting about a warm, golden English muffin, split open and slathered with butter and jam. While store-bought versions are convenient, I’m here to tell you that making them from scratch is surprisingly straightforward and incredibly rewarding. Forget those dense, crum extractbly imposters; these homemade beauties boast that signature nooks-and-crannies texture you’re looking for, with a delightful chew and a satisfying bite. Best of all, they don’t require a stand mixer or a whole afternoon. You can absolutely achieve delicious, authentic English muffins right in your own kitchen with simple ingredients and a little patience. Let’s get started!
Ingredients:
Bringin extractg the Dough Together
1. Activate the Yeast: In a medium-sized mixing bowl, combine the warm water and sugar. Give it a gentle stir to dissolve the sugar. Sprinkle the instant dry yeast over the surface of the water. Let it sit undisturbed for about 5-10 minutes. You should see the yeast begin extract to bloom, creating a foamy, frothy layer on top. This indicates your yeast is alive and ready to work its magic. If you don’t see any foam, your yeast might be old, or the water was too hot or too cold, and you’ll need to start this step again with fresh yeast and properly warmed water.
2. Combine Wet and Dry Ingredients: Once the yeast has bloomed, add the oil (or melted butter) to the bowl. Whisk it in gently. Now, add the flour and salt to the wet ingredients. I like to add the flour gradually, stirring with a sturdy spoon or a spatula until a shaggy dough starts to form. It might seem a little sticky at this stage, and that’s perfectly normal.
3. Kneading the Dough: Turn the dough out onto a lightly floured surface. Begin extract to knead the dough. If using all-purpose flour, you might find you need a little more of that “extra up to 1/4 cup” to prevent the dough from being too sticky. Add it a tablespoon at a time, just until the dough is smooth, elastic, and no longer sticking excessively to your hands or the counter. Bread flour will likely require less, if any, extra flour. Knead for about 8-10 minutes. The dough should feel soft and slightly tacky, but it should spring back slowly when you gently poke it with a finger. This kneading process develops the gluten, which is essential for that classic English muffin chew.
The Rise and Shaping
4. First Rise (Bulk Fermentation): Lightly grease a clean bowl with a little oil. Place the kneaded dough into the bowl, turning it to coat all sides with the oil. Cover the bowl tightly with plastic wrap or a damp kitchen towel. Find a warm, draft-free spot in your kitchen for the dough to rise. This usually takes about 1 to 1.5 hours, or until the dough has doubled in size. During this time, the yeast is fermenting, producing gases that will create those wonderful air pockets in your muffins.
5. Shaping the Muffins: Once the dough has doubled, gently punch it down to release the air. Turn the dough out onto a lightly floured surface. You can do this in a couple of ways. You can pat the dough out to about 1/2 inch thickness and then use a 3-inch round cookie cutter or even a glass rim to cut out your muffin rounds. Alternatively, you can gently divide the dough into 8 equal pieces and shape each piece into a flat disc. Don’t overwork the dough at this stage; you want to preserve some of those lovely air pockets. Place the shaped muffin rounds onto a baking sheet or a piece of parchment paper that has been generously dusted with cornmeal. Make sure to leave a little space between them.
Cooking for Those Craggy Cracks
6. Second Rise and Preparation for Cooking: Cover the shaped muffins loosely with plastic wrap or a clean kitchen towel. Let them rest in a warm place for another 30-45 minutes, or until they have puffed up nicely and look airy. While they’re having their second rise, prepare your cooking surface. A heavy-bottomed skillet, like cast iron, is ideal for this. You can also use a griddle. Heat the skillet over medium-low heat. It’s crucial not to have the heat too high, or the outside will burn before the inside cooks. Generously dust the heated skillet with more cornmeal.
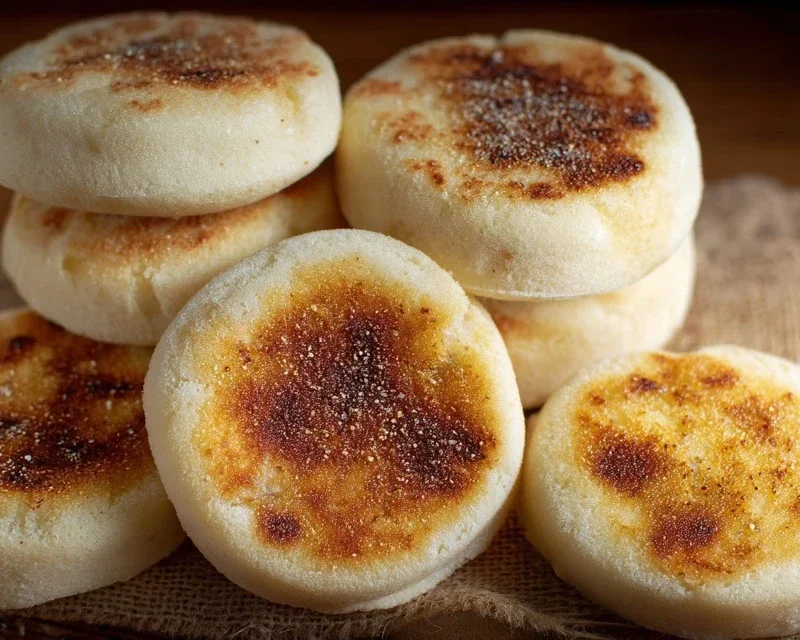
7. Cooking the Muffins: Carefully transfer the risen muffin rounds (still on the cornmeal-dusted parchment if you used it, or directly from your shaping surface, ensuring they have cornmeal on the bottom) into the preheated, cornmeal-dusted skillet. You’ll likely need to cook them in batches, so don’t overcrowd the pan. Cook for about 5-7 minutes per side, until they are golden brown and cooked through. You’ll see them puff up and start to form those signature craggy tops as they cook. Gently flip them with a spatula. Once cooked, remove them from the skillet and place them on a wire rack to cool slightly. The key to getting that wonderful nooks-and-crannies texture is to cook them slowly and evenly, and to resist the urge to press them down while they’re cooking.
Allow your beautiful homemade English muffins to cool for a few minutes before splitting them open with a fork (this is key for those craggy nooks!) and toasting them. Enjoy them with your favorite toppings!
Conclusion:
There you have it! My foolproof recipe for easy homemade English muffins. I truly believe this recipe is fantastic because it demystifies the process, proving that those iconic nooks and crannies are achievable right in your own kitchen with simple ingredients and straightforward steps. No special equipment needed, just a bit of patience and a sprinkle of love.
These delightful rounds are incredibly versatile. For a classic breakfast, toast them golden brown and slather with butter. They’re also the perfect foundation for eggs Benedict, avocado toast, or even a simple sandwich. Feel free to get creative! You can add a pinch of herbs or a dash of spice to the dough for a unique flavor profile. Perhaps try incorporating some finely chopped chives or a whisper of garlic powder for a savory twist.
I wholeheartedly encourage you to give this recipe a try. The satisfaction of pulling warm, fragrant English muffins from your oven is unparalleled. It’s a rewarding culinary adventure that the whole family will enjoy, and you’ll likely find yourself reaching for this recipe again and again.
Frequently Asked Questions:
Why aren’t my English muffins developing enough nooks and crannies?
The key to those signature nooks and crannies lies in the cooking process. Ensure your griddle or pan is at a medium-low heat and that you’re not overcrowding it. Also, allow the muffins to cook for a good 5-7 minutes per side, resisting the urge to flip them too early or too often. A gentle poke can help ensure they’re set before flipping.
Can I make these ahead of time?
Absolutely! Once cooled completely, homemade English muffins can be stored in an airtight container at room temperature for 2-3 days, or frozen for longer storage. Simply toast them from frozen or thawed for that fresh-baked taste.
Easy Homemade English Muffins
Whip up a batch of delicious, fluffy homemade English muffins with this simple recipe. Perfect for breakfast or brunch!
Ingredients
-
1 ¼ cups warm water
-
1 tablespoon sugar
-
1 teaspoon instant dry yeast
-
2 tablespoon oil (canola, vegetable or neutral olive oil)
-
2 ¾ cups all purpose flour or bread flour
-
1 teaspoon salt
-
cornmeal for dusting
Instructions
-
Step 1
In a large bowl, combine the warm water, sugar, and yeast. Let it sit for 5-10 minutes until foamy. -
Step 2
Stir in the oil. Gradually add the flour and salt, mixing until a shaggy dough forms. If the dough is too sticky, add up to 1/4 cup more flour. -
Step 3
Turn the dough out onto a lightly floured surface and knead for about 5-7 minutes, until smooth and elastic. -
Step 4
Place the dough in a greased bowl, cover, and let it rise in a warm place for about 1 hour, or until doubled in size. -
Step 5
Punch down the dough and turn it out onto a surface lightly dusted with cornmeal. Roll it out to about 1/2 inch thickness. Cut out rounds using a 3-inch cutter. -
Step 6
Place the rounds on a baking sheet lined with parchment paper and dusted with cornmeal. Let them rest for another 15-20 minutes. -
Step 7
Heat a lightly greased griddle or frying pan over medium heat. Cook the English muffins for about 4-5 minutes per side, until golden brown and cooked through.
Important Information
Nutrition Facts (Per Serving)
It is important to consider this information as approximate and not to use it as definitive health advice.
Allergy Information
Please check ingredients for potential allergens and consult a health professional if in doubt.