Buster Bar Ice Cream Dessert- Easy No-Bake Treat
Buster Bar Ice Cream Dessert. Oh, how I love this nostalgic treat! If you, like me, grew up with the iconic Buster Bar as your go-to frozen indulgence, then get ready to be transported back to those carefree summer days. This beloved ice cream dessert isn’t just a frozen confection; it’s a symphony of textures and flavors that just screams pure joy. We’re talking about that perfect combination of creamy vanilla ice cream, a crunchy chocolatey coating, and often, a surprising nutty core. What makes the Buster Bar Ice Cream Dessert so enduringly popular? It’s that satisfying crunch followed by the smooth, cool melt of the ice cream, all wrapped up in a rich, delicious shell. It’s simple, it’s delicious, and it’s guaranteed to bring a smile to your face. Today, we’re going to recreate that magic right in your own kitchen, with a few little twists to make it even more spectacular.
Buster Bar Ice Cream Dessert
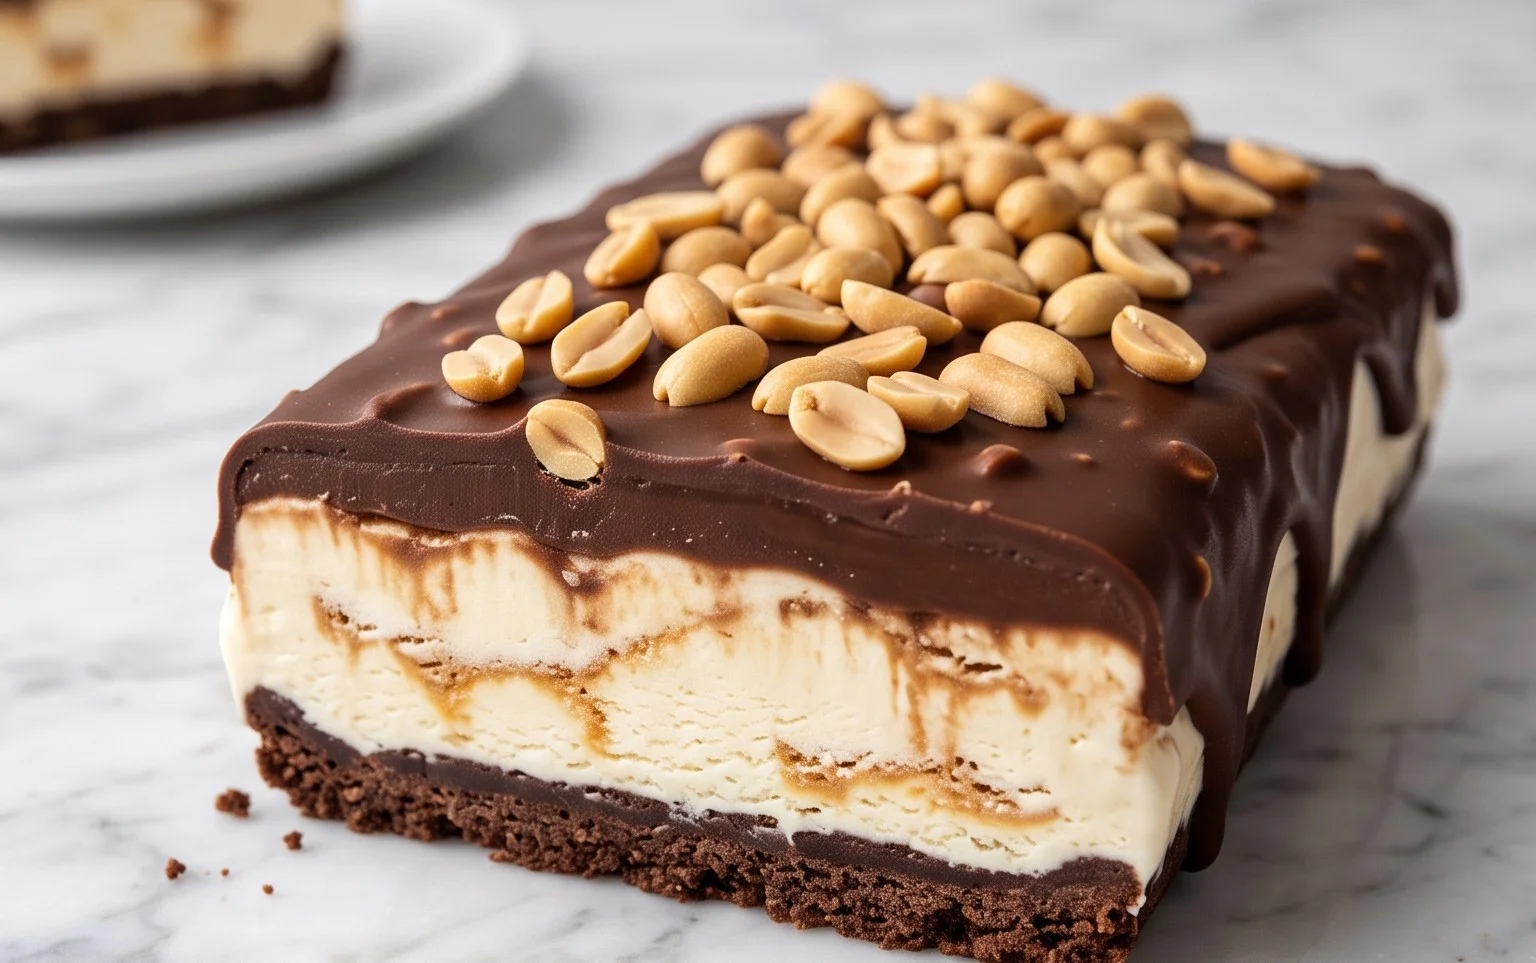
Get ready for a nostalgic trip down memory lane with this incredibly easy and utterly delicious Buster Bar Ice Cream Dessert! This recipe is a faithful recreation of that beloved frozen treat, but with the added joy of being able to make it right in your own kitchen. We’re talking layers of crunchy cookie crust, creamy vanilla ice cream, a rich chocolatey magic shell, and a generous coating of salty Spanish peanuts. It’s the perfect dessert for summer gatherings, a special family night, or honestly, any time you’re craving a serious treat. The best part? It’s wonderfully simple to assemble, making it a fantastic option even for begin extractner bakers. So grab your apron, and let’s get ready to create some frozen magic!
Ingredients:
Crust Assembly
The foundation of our Buster Bar masterpiece is a simple yet satisfying cookie crust. We’re going to take that entire package of Oreo cookies – yes, the whole thing, creme filling and all – and crush them into fine crum extractbs. You can achieve this by placing them in a sturdy zip-top bag and going to town with a rolling pin or the bottom of a heavy pan. Alternatively, a food processor will make quick work of this step. Once you have your beautifully crushed Oreo crum extractbs, transfer them to a medium bowl. Now, pour in that half cup of melted butter. Mix it all together thoroughly until every crum extractb is moistened. This is crucial for creating a crust that holds together and has a delightful chegrape juicess.
Next, we’ll prepare our baking dish. A 9×13 inch baking pan is ideal for this recipe. You can either line it with parchment paper, leaving some overhang on the sides to make lifting the finished dessert out easier, or you can simply grease it well. Press the Oreo crum extractb and butter mixture evenly into the bottom of the prepared pan. Use the back of a spoon or the bottom of a glass to ensure a firm, compact layer. This will prevent your ice cream from sinking through and will give you that satisfying crunch with every bite. Once pressed, pop this into the freezer for at least 30 minutes to allow it to firm up while we move on to the next layer.
Ice Cream Layer
Now for the creamy heart of our Buster Bar! Make sure your vanilla ice cream has softened to a scoopable, but not melted, consistency. This usually takes about 15-30 minutes on the counter, depending on the temperature of your kitchen. You don’t want it to be a liquid puddle, or it will be too difficult to spread. If it’s too hard, you’ll struggle to get an even layer. Once it’s at the perfect consistency, retrieve your chilled crust from the freezer.
Carefully spread the softened vanilla ice cream evenly over the firm Oreo crust. Try to get it as smooth and level as possible. This might take a little bit of patience, but a good even layer will make for a much prettier and more enjoyable final product. For a smoother finish, you can dip your spatula in hot water, dry it off, and then use it to smooth the ice cream. Once the ice cream is spread, return the entire pan to the freezer. We need this layer to freeze solid, which will take at least 2-3 hours, or ideally, overnight. The colder and harder this layer is, the easier it will be to add our toppings without them melting into the ice cream.
The Magic Shell and Peanut Coating
This is where the real Buster Bar magic happens! We’re going to create that iconic, crackable chocolate shell and combine it with the salty crunch of peanuts. First, let’s prepare our peanut coating. You’ll want to have your pound of Spanish peanuts ready. If they are whole, you can give them a rough chop, but it’s not strictly necessary. Many people enjoy the full crunch of whole peanuts in their Buster Bars. Set them aside for now.
Now, let’s make the chocolate magic shell. In a medium saucepan over low heat, combine the 12 ounces of semi-sweet chocolate chips, the half cup of butter, and the 12 ounces of evaporated milk. Stir constantly. This is a delicate process, as you don’t want to scorch the chocolate. Keep the heat low and stir gently until all the ingredients have melted and are completely combined into a smooth, glossy chocolate mixture. This should create a rich and decadent chocolate sauce. Once smooth, remove the pan from the heat.
Now, we need to quickly assemble the final layers. Retrieve your frozen ice cream from the freezer. You’ll notice it’s now a solid block. Immediately pour the warm (but not hot!) chocolate mixture over the frozen ice cream. Work quickly and spread it as evenly as possible with a spatula. The cold from the ice cream will help the chocolate shell set rapidly. As soon as the chocolate is spread, generously sprinkle the Spanish peanuts over the top of the chocolate. Press them down gently to help them adhere to the chocolate before it fully hardens.
Freezing and Serving
Once the peanuts are in place, it’s time for the final freeze. Carefully transfer the pan back into the freezer. We need this dessert to freeze completely solid, which will take at least another 4-6 hours, but overnight is truly best. This ensures the chocolate shell is firm and the ice cream is completely frozen.
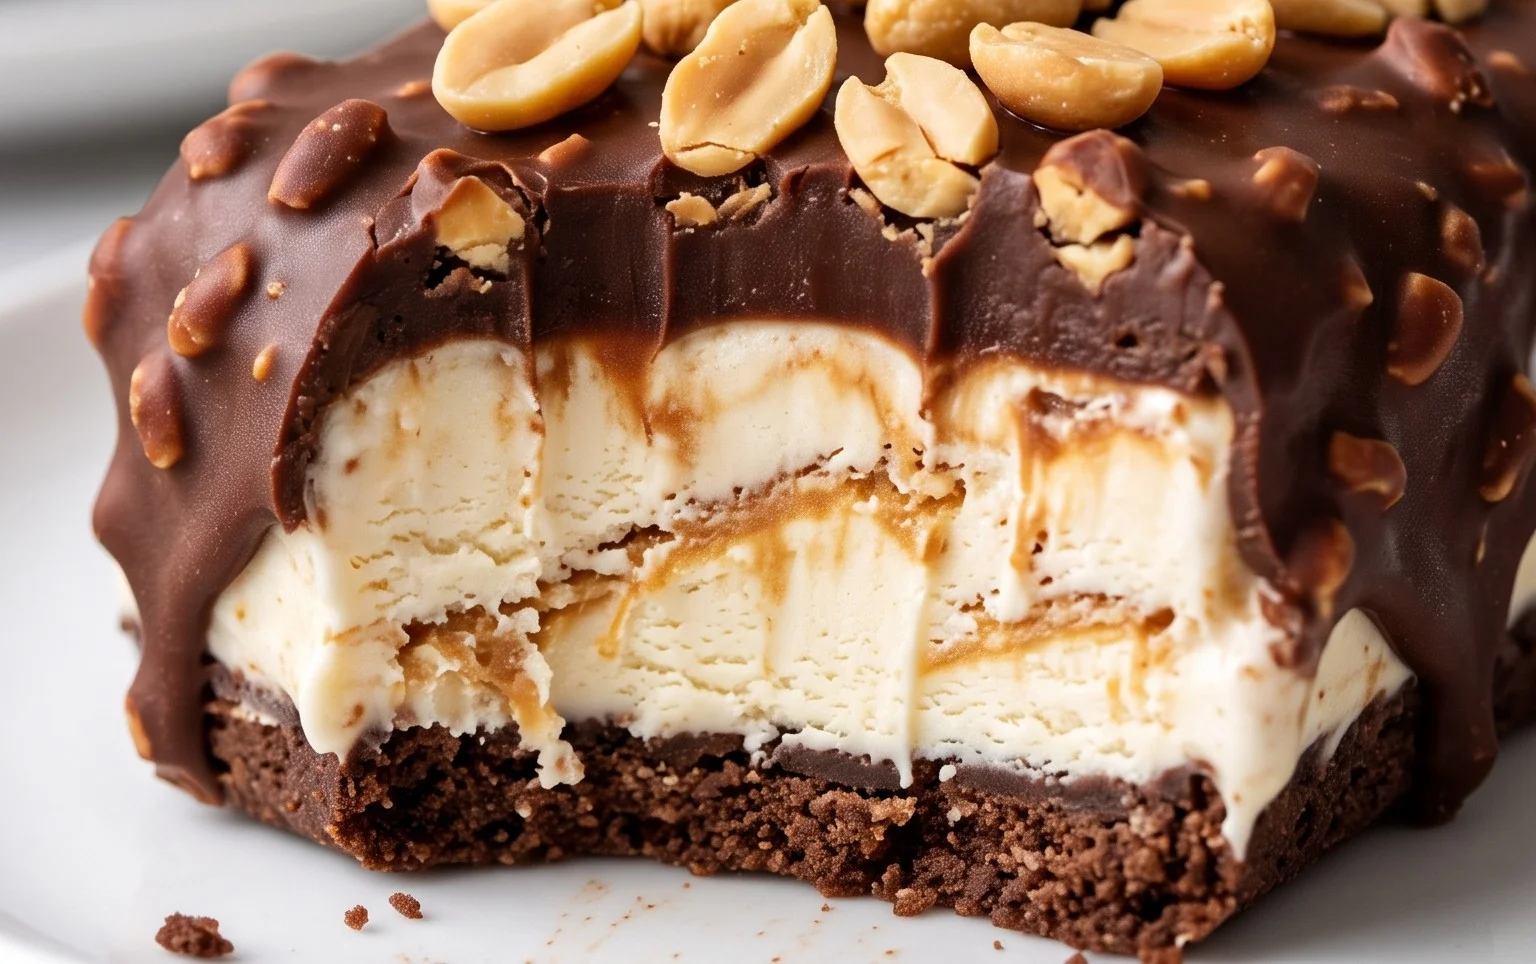
When you’re ready to serve, remove the pan from the freezer. The parchment paper overhang will be your best friend here, allowing you to lift the entire frozen slab out of the pan. Place it on a cutting board. Now, for the satisfying part: slice the Buster Bar dessert into individual portions using a sharp knife. You might need to run the knife under hot water and dry it between cuts if it’s too firm. Serve immediately and enjoy the incredible layers of flavor and texture. This Buster Bar Ice Cream Dessert is sure to be a hit!
Conclusion:
And there you have it! This Buster Bar Ice Cream Dessert recipe truly delivers on all fronts. It’s a fantastic way to recreate that beloved, nostalgic ice cream truck treat right in your own kitchen, offering layers of creamy, crunchy, and chocolatey goodness in every bite. The beauty of this dessert lies in its delightful simplicity and its incredible adaptability. Whether you’re a seasoned baker or just starting out, you’ll find this recipe incredibly rewarding and surprisingly easy to master, making it perfect for any occasion, from a casual family gathering to a more special celebration. The combination of the cool ice cream, the rich chocolate coating, and the satisfying crunch is simply irresistible.
I love serving this Buster Bar Ice Cream Dessert chilled, just as it is, allowing the layers to set perfectly. It’s also wonderful alongside a cup of coffee or a glass of cold milk. Feel free to get creative with the variations! You could sprinkle the top with chopped nuts like peanuts or almonds before the chocolate hardens, or even swirl in some caramel sauce for an extra decadent touch. Don’t be afraid to experiment with different types of chocolate for the coating – milk, dark, or even white chocolate can offer a unique twist. I wholeheartedly encourage you to give this Buster Bar Ice Cream Dessert a try. You won’t regret the delicious results!
Frequently Asked Questions about Buster Bar Ice Cream Dessert:
Q: Can I make this Buster Bar Ice Cream Dessert ahead of time?
A: Absolutely! This dessert is actually best made a few hours in advance, or even the day before. This allows the ice cream to firm up properly and the chocolate coating to set completely, ensuring you get that signature “snap” when you bite into it. Store them in an airtight container in the freezer.
Q: What kind of ice cream should I use for this recipe?
A: The classic Buster Bar flavor often features vanilla or a vanilla-based ice cream. However, feel free to use your favorite! Chocolate ice cream would be a decadent choice, or even a strawberry or cookies and cream variety could create exciting new flavor profiles. Just make sure the ice cream is firm enough to hold its shape when you’re ready to coat it.
Q: My chocolate coating is too thick. How can I fix it?
A: If your chocolate coating is becoming too thick and difficult to work with, gently warm it up again over a double boiler or in very short bursts in the microwave, stirring frequently. Be careful not to overheat it, as this can cause the chocolate to seize. Adding a teaspoon or two of a neutral oil, like coconut oil or vegetable oil, can also help thin it out beautifully.
Buster Bar Ice Cream Dessert
A no-bake dessert featuring a crushed Oreo crust, creamy vanilla ice cream, a peanut and chocolate topping, and a rich chocolate fudge sauce.
Ingredients
-
1 14.3 oz pkg. of Oreo cookies, crushed
-
1/2 C butter, melted
-
1/2 gal. vanilla ice cream, softened
-
1 lb. Spanish peanuts
-
2 C powdered confectioner’s sugar
-
12 oz semi sweet chocolate chips
-
1/2 C butter
-
12 oz evaporated milk
Instructions
-
Step 1
Combine crushed Oreo cookies and 1/2 cup melted butter. Press mixture into the bottom of a 9×13 inch pan. -
Step 2
Spread softened vanilla ice cream evenly over the cookie crust. -
Step 3
In a separate bowl, mix together Spanish peanuts, powdered confectioner’s sugar, and 1/2 cup butter. This will form a crumbly topping. -
Step 4
Sprinkle the peanut and sugar mixture evenly over the ice cream layer. -
Step 5
Melt the semi-sweet chocolate chips with the evaporated milk over low heat, stirring until smooth to create a fudge sauce. Be careful not to burn the chocolate. -
Step 6
Drizzle the warm chocolate fudge sauce over the peanut topping. -
Step 7
Freeze for at least 4 hours, or until firm, before cutting into bars and serving.
Important Information
Nutrition Facts (Per Serving)
It is important to consider this information as approximate and not to use it as definitive health advice.
Allergy Information
Please check ingredients for potential allergens and consult a health professional if in doubt.