Cheesy Pizza Bombs-Easy Flavor Packed Bites
Cheesy Pizza Bombs are the ultimate comfort food explosion you didn’t know you needed! Imagin extracte biting into a warm, pillowy dough pocket that gives way to a molten core of gooey, bubbling cheese, infused with classic pizza flavors. It’s no wonder these little delights have become a crowd-pleaser, perfect for game nights, quick weeknight dinners, or just satisfying those irresistible cravings. What makes these Cheesy Pizza Bombs so special is their incredible versatility and the pure joy they bring with every bite. They’re incredibly easy to make, meaning you can whip up a batch of pure happiness without spending hours in the kitchen. The secret lies in the perfect balance of tender dough, rich tomato sauce, and a generous blend of your favorite cheeses that stretch to infinity. Get ready to fall in love with these addictive, flavor-packed bites!

Ingredients:
- 1 can (16 oz) refrigerated biscuit dough (this will give you 8 large biscuits)
- 1/2 cup pizza sauce (have a little extra on hand for dipping later, it’s a game-changer!)
- 1 cup shredded mozzarella cheese (the melty, gooey kind is best here)
- 1/4 cup mini beef beef pepperoni (if you can’t find mini, just chop up regular beef pepperonieroni into small pieces)
- 1 teaspoon Italian seasoning (this blend of herbs really elevates the pizza flavor)
- 1/4 cup melted butter (unsalted is ideal, but salted works too)
- 1 tablespoon grated Parmesan cheese (for that extra savory punch)
Preparing Your Cheesy Pizza Bombs
Step 1: Preheat Your Oven and Prepare Your Baking Sheet
First things first, let’s get our oven ready to bake these delicious Cheesy Pizza Bombs. Preheat your oven to 375°F (190°C). While the oven is heating up, take a baking sheet and line it with parchment paper or aluminum foil. This is a crucial step for easy cleanup later, as the cheese can get a little messy. If you don’t have parchment paper, a light greasing of the baking sheet with cooking spray or a little oil will also do the trick.
Step 2: Create Your Cheesy Pizza Bomb Centers
Now for the fun part – filling! Open your can of refrigerated biscuit dough. You should have 8 biscuits. Carefully separate them. For each biscuit, you’ll want to flatten it out slightly. You can do this by gently pressing it with your fingers or using a rolling pin on a lightly floured surface. Aim for a circle about 4-5 inches in diameter. Don’t worry if they aren’t perfectly round; these are meant to be rustic and fun. In a small bowl, combine your shredded mozzarella cheese and chopped beef pepperoni pepperoni. This is going to be the heart of your pizza bombs.
Step 3: Assemble the Cheesy Pizza Bombs
Place about 1 to 1.5 tablespoons of the pizza sauce in the center of each flattened biscuit. Be careful not to put too much sauce, as it can make the dough soggy. Now, spoon a generous amount of ybeef pepperonie and pepperoni mixture over the pizza sauce. You want a good amount of filling, but not so much that it spills out when you close the bombs. To seal the deal, carefully gather the edges of the biscuit dough up and over the filling, pinching them together firmly in the center to create a senon-alcoholic aled ball. Make sure there are no gaps where the cheese can escape during baking. You can gently roll the ball in your hands to ensurnon-alcoholic alet’s well-sealed and somewhat uniformly shaped. Place each assembled pizza bomb, seam-side down, onto your prepared baking sheet. Leave a little space between each one as they will puff up during baking.
Step 4: Bake to Golden Perfection
Once all your Cheesy Pizza Bombs are assembled and on the baking sheet, it’s time for them to hit the oven. Place the baking sheet in your preheated oven. Bake for approximately 15 to 18 minutes. You’re looking for the biscuits to be puffed up, golden brown on top and bottom, and for the cheese inside to be delightfully melted and gooey. Keep an eye on them towards the end of the baking time, as ovens can vary. If you notice one side browning faster than the other, you can carefully rotate the baking sheet halfway through the baking process.
Step 5: The Finishing Touches for Maximum Flavor
While your pizza bombs are baking, melt your butter in a small bowl. Once melted, stir in the grated Parmesan cheese and the Italian seasoning. This is going to be your flavor-packed topping. As soon as your Cheesy Pizza Bombs come out of the oven, immediately brush this glorious butter mixture over the tops. The hot bombs will absorb the buttery goodness, making them even more irresistible. Let them cool on the baking sheet for a few minutes before transferring them to a serving platter. Serve them warm, and don’t forget that extra pizza sauce you saved for dipping! These are perfect as an appetizer, a snack, or even a fun dinner.
Conclusion:
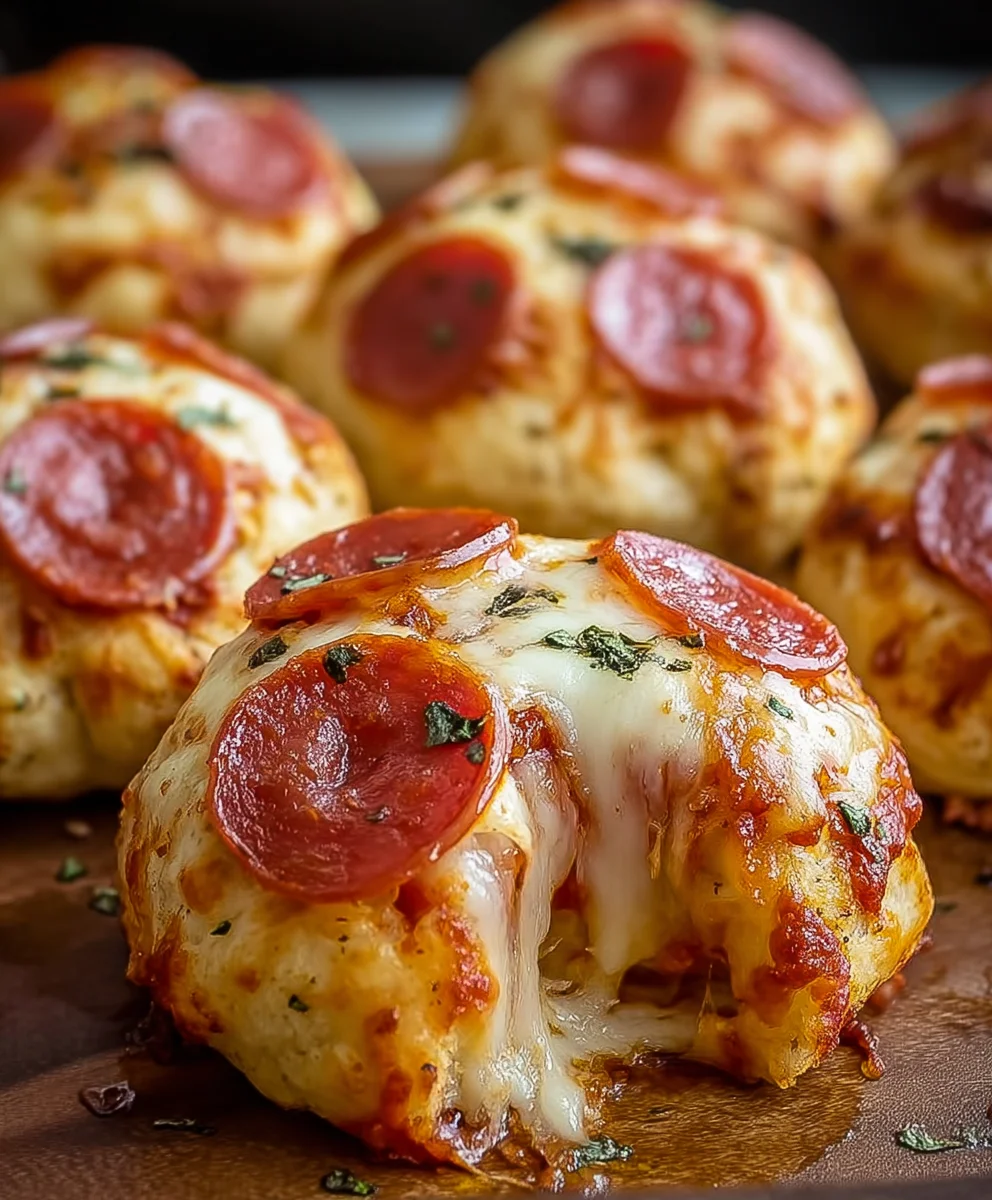
There you have it! You’ve successfully created your very own batch of delicious Cheesy Pizza Bombs. This recipe is incredibly rewarding, offering a delightful explosion of pizza flavors in every bite. The golden-brown exterior, combined with the gooey, melted cheese and savory pizza sauce, makes these Cheesy Pizza Bombs a guaranteed hit for any occasion. Whether you’re hosting a party, looking for a fun family activity, or simply craving a comforting snack, these little flavor bombs are sure to impress. I encourage you to give them a try and enjoy the process as much as the final product. Don’t be afraid to get creative with your fillings and toppings!
For serving suggestions, these Cheesy Pizza Bombs are fantastic on their own as an appetizer or snack. They also pair wonderfully with a side of marinara sauce for dipping, a fresh green salad, or even alongside your favorite pasta dish for an extra cheesy kick. Feel free to experiment with different cheeses like mozzarella, cheddar, provolone, or a blend! You can also add finely chopped beef pepperoni, cooked sausage, or sautéed vegetables to the cheese mixture for even more flavor depth.
Frequently Asked Questions:
Q1: Can I make Cheesy Pizza Bombs ahead of time?
Yes, you can prepare the dough and the filling mixture ahead of time. You can even assemble the Cheesy Pizza Bombs and freeze them before baking. Just bake them directly from frozen, adding a few extra minutes to the baking time.
Q2: What are some good vegetarian variations for Cheesy Pizza Bombs?
For a vegetarian option, you can add finely chopped sautéed mushrooms, bell peppers, onions, or spinach to the cheese filling. Olives and jalapeños also make excellent vegetarian additions!
Cheesy Pizza Bombs-Easy Flavor Packed Bites
Quick and easy, these cheesy pizza bombs are bursting with flavor and perfect for appetizers, snacks, or a fun meal.
Ingredients
-
1 can (16 oz) refrigerated biscuit dough (8 biscuits)
-
1/2 cup pizza sauce, plus extra for dipping
-
1 cup shredded mozzarella cheese
-
1/4 cup mini beef pepperoni, chopped
-
1 teaspoon Italian seasoning
-
1/4 cup melted butter
-
1 tablespoon grated Parmesan cheese
Instructions
-
Step 1
Preheat oven to 375°F (190°C). Line a baking sheet with parchment paper or aluminum foil for easy cleanup. -
Step 2
Separate the 8 refrigerated biscuit dough pieces. Flatten each biscuit into a 4-5 inch circle. In a small bowl, combine shredded mozzarella cheese and chopped beef pepperoni. -
Step 3
Place 1-1.5 tablespoons of pizza sauce in the center of each flattened biscuit. Spoon a generous amount of the cheese and pepperoni mixture over the sauce. Gather the edges of the dough up and pinch firmly in the center to create a sealed ball. Place seam-side down on the prepared baking sheet. -
Step 4
Bake for 15-18 minutes, or until puffed, golden brown, and the cheese is melted and gooey. Rotate the baking sheet halfway through if needed. -
Step 5
While baking, melt butter and stir in grated Parmesan cheese and Italian seasoning. Immediately brush this mixture over the hot pizza bombs as soon as they come out of the oven. Let cool slightly before serving with extra pizza sauce for dipping.
Important Information
Nutrition Facts (Per Serving)
It is important to consider this information as approximate and not to use it as definitive health advice.
Allergy Information
Please check ingredients for potential allergens and consult a health professional if in doubt.