Easy Homemade Bread Recipe – Bake Delicious Bread Fast
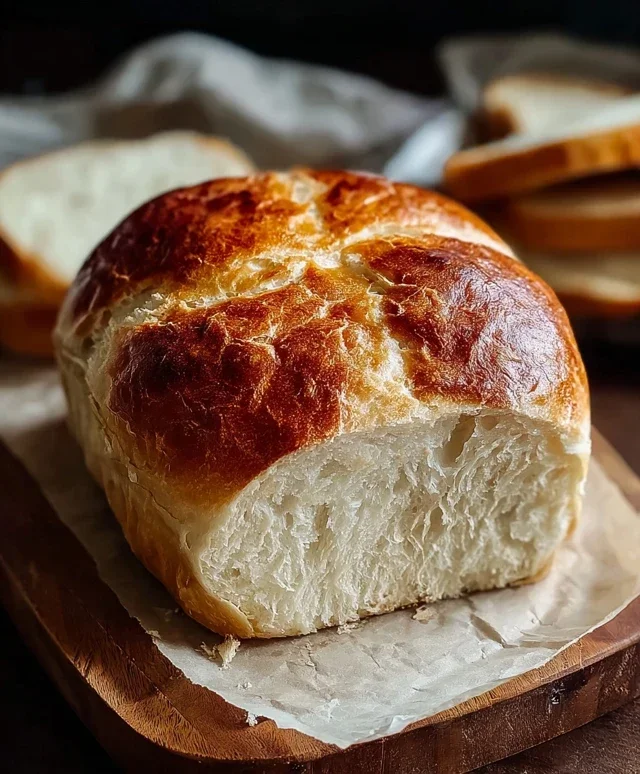
Easy Homemade Bread is more than just a recipe; it’s an invitation to a simpler, more satisfying way of life. Imagin extracte the aroma filling your kitchen – that warm, comforting scent that whispers of cozy mornings and shared meals. There’s a primal satisfaction in transforming humble ingredients into a golden-crusted loaf, a testament to your own hands. This isn’t about complicated techniques or specialty flours; this easy homemade bread is designed for busy lives and aspiring bakers. It’s about the joy of that first, warm slice, slathered with butter, tasting infinitely better than anything store-bought. You’ll discover why so many people fall in love with baking their own bread – the incredible flavor, the delightful texture, and the profound sense of accomplishment. Let’s embark on this delicious journey together and unlock the magic of truly delicious easy homemade bread.”
Easy Homemade Bread
There’s something incredibly satisfying about pulling a warm, crusty loaf of bread from your own oven. It smells divine, tastes even better, and the process of making it from scratch is surprisingly straightforward, even for begin extractners. Forget those complicated recipes with hours of kneading and proofing; this is an “easy homemade bread” recipe designed for busy lives and guaranteed delicious results. We’re going to walk through it step-by-step, and you’ll be amazed at how simple it is to create a foundational bread that’s perfect for slicing, toasting, or just enjoying with a slather of butter.
This recipe uses minimal ingredients that you likely already have in your pantry or can easily find at any grocery store. The beauty of homemade bread lies in its simplicity and the control you have over the ingredients. No preservatives, no artificial flavors, just pure, wholesome goodness. So, let’s get started on your journey to becoming a home baker!
Ingredients:
Mixing and Kneading the Dough
The first step in creating our delicious homemade bread is to activate the yeast and bring our ingredients together into a cohesive dough.
1. Activate the Yeast: In a large mixing bowl, combine the 1 ½ cups of warm water. The water should be warm to the touch, like a comfortable bath for a baby – around 105-115°F (40-46°C). If it’s too hot, it will kill the yeast, and if it’s too cold, it won’t activate properly. To this warm water, add the packet of instant yeast. Give it a gentle stir, and then let it sit for about 5-10 minutes. You should see the yeast start to get foamy and bubbly on the surface. This indicates that your yeast is alive and ready to work its magic, creating those wonderful air pockets that make bread light and airy. If you don’t see any foam, your yeast might be old, or the water temperature was off, and you’ll need to start again with fresh yeast.
2. Combine Wet and Dry Ingredients: Once your yeast is happily frothing, it’s time to add the other ingredients. Add the 3 cups of bread flour (or all-purpose flour if that’s what you have on hand – bread flour has a higher protein content which can lead to a chewier crust, but all-purpose will still yield a fantastic loaf) and the 2 ½ teaspoons of kosher salt directly into the bowl with the activated yeast mixture. The salt is crucial not only for flavor but also to control the yeast’s activity, preventing it from fermenting too quickly.
3. Forming the Dough and Initial Knead: Using a sturdy spoon or a spatula, mix everything together until a shaggy dough begin extracts to form. It will look messy at this stage, with dry bits of flour still visible. Once it starts to come together, you can switch to using your hands to incorporate the remaining flour. Turn the dough out onto a lightly floured surface. Now comes the kneading! This process develops the gluten in the flour, which gives bread its structure and chewy texture. Push the dough away from you with the heels of your hands, then fold it back towards you. Rotate the dough a quarter turn and repeat. Continue this rhythmic push, fold, and turn motion for about 8-10 minutes. You’re looking for the dough to become smooth, elastic, and no longer sticky. It should spring back slowly when you poke it with a finger. If it’s too sticky, add a tiny bit more flour, just a tablespoon at a time. Conversely, if it feels too stiff, you can lightly wet your hands and continue kneading.
Proofing the Dough
Now that we have a beautifully kneaded dough, it needs time to rise. This is where the yeast really gets to work, producing carbon dioxide gas that makes the dough expand.
4. First Rise (Bulk Fermentation): Lightly grease a clean bowl with a little bit of oil or cooking spray. Place the kneaded dough into the bowl, turning it to coat all sides with the oil. Cover the bowl tightly with plastic wrap or a damp kitchen towel. Find a warm, draft-free spot in your kitchen for the dough to rise. An oven that has been turned on for a minute and then turned off is a perfect spot, or even just on your countertop on a slightly warmer day. Let the dough rise for about 1 to 1 ½ hours, or until it has doubled in size. You’ll notice it puff up considerably, becoming light and airy. This resting period is essential for developing flavor and texture.
Shaping and Baking
Once our dough has had its glorious rise, we’re almost ready for the oven!
5. Shaping the Loaf and Second Rise: Gently punch down the risen dough to release some of the trapped air. Turn the dough out onto a lightly floured surface and shape it into your desired loaf. For a classic round loaf (boule), gently tuck the edges underneath to create surface tension and form a smooth ball. For a rectangular loaf (batard), gently pat it into an oval and then fold it in half lengthwise, pinching the seam to seal. Place the shaped dough onto a baking sheet lined with parchment paper or into a greased loaf pan. Cover it loosely with plastic wrap or a clean kitchen towel and let it rise again for another 30-45 minutes, or until it looks puffy and has increased in size by about 50-75%. While the dough is on its second rise, preheat your oven to 400°F (200°C). If you’re using a Dutch oven or baking stone, place it in the oven as it preheats.
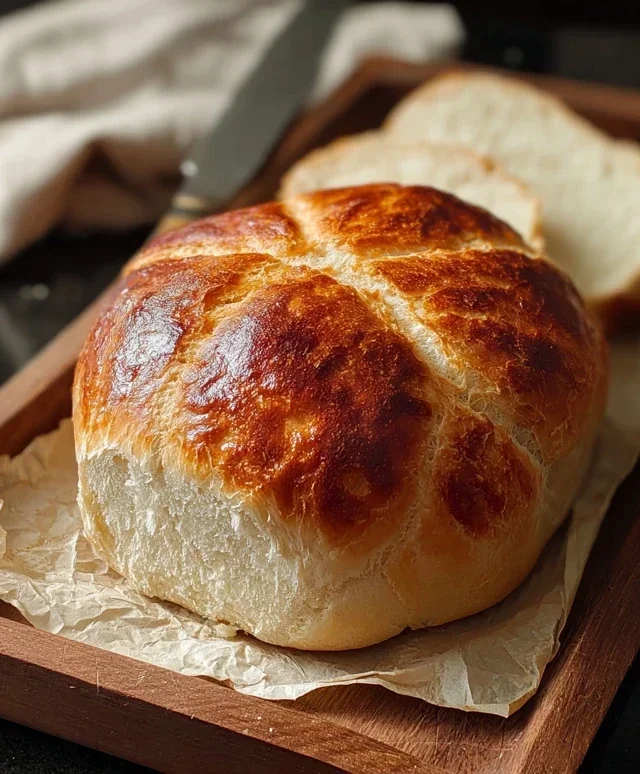
6. Baking the Bread: Once the dough has completed its second rise and the oven is preheated, it’s time to bake! If you’re using a baking sheet, you can optionally score the top of the loaf with a sharp knife or a lame (a special bread-scoring tool) in a pattern of your choice. This helps the bread expand evenly in the oven and looks beautiful. Carefully slide the loaf into the preheated oven. If you’re using a Dutch oven, carefully place the dough into the hot Dutch oven, cover it with the lid, and bake for 20 minutes. Then, remove the lid and continue baking for another 20-25 minutes, or until the crust is a deep golden brown and the internal temperature of the bread reaches 200-210°F (93-99°C) when tested with an instant-read thermometer. If you’re not using a Dutch oven, bake directly on the baking sheet or in the loaf pan for 30-35 minutes, until the crust is a deep golden brown and the bread sounds hollow when tapped on the bottom.
Allow the bread to cool completely on a wire rack before slicing. This is perhaps the hardest part, but it’s crucial for the bread’s texture to set properly. Enjoy your delicious, easy homemade bread!
Conclusion:
See? Making delicious, easy homemade bread is absolutely achievable! This recipe truly shines because it simplifies the process without sacrificing that wonderful, comforting flavor and texture we all crave from freshly baked bread. Whether you’re a seasoned baker or a complete begin extractner, you’ll be delighted with how straightforward and rewarding this project is. The aroma filling your kitchen as it bakes is an experience in itself! Enjoy this versatile loaf as the perfect accompaniment to soups and stews, as the base for incredible sandwiches, or simply slathered with butter and jam. Feel free to experiment with variations – add herbs like rosemary or thyme to the dough, or a handful of seeds for extra texture and flavor. Don’t be intimidated; give this easy homemade bread recipe a try this weekend. I promise, the satisfaction of pulling your own warm loaf from the oven is unmatched!
Frequently Asked Questions:
What if my dough doesn’t rise much?
Several factors can affect dough rise. Ensure your yeast is fresh and not expired. Water temperature is crucial; it should be lukewarm (around 105-115°F or 40-46°C), not too hot or too cold. Also, be patient with the rising time; some environments are cooler and may require a bit longer. Make sure you’re not adding too much flour, which can make the dough too dense.
Can I make this bread ahead of time?
Absolutely! Once cooled, this easy homemade bread can be stored in an airtight container or a bread bag at room temperature for 2-3 days. For longer storage, slice the cooled loaf and freeze it in a freezer-safe bag. You can then toast slices directly from frozen.
How can I get a crispier crust?
To achieve a wonderfully crisp crust, preheat a baking sheet or pizza stone in your oven. You can also create steam by placing a shallow pan of water on the rack below your bread during the first 15-20 minutes of baking. Remove the water pan for the remainder of the baking time.
Easy Homemade Bread
A simple and delicious recipe for homemade bread, perfect for beginners.
Ingredients
-
1 ½ cups warm water
-
3 cups bread flour
-
1 packet Instant Yeast
-
2 ½ teaspoons kosher salt
-
1 tablespoon olive oil
-
1 teaspoon sugar
Instructions
-
Step 1
In a large bowl, combine warm water, sugar, and instant yeast. Let it sit for 5-10 minutes until foamy. -
Step 2
Add bread flour, kosher salt, and olive oil to the bowl. Mix until a shaggy dough forms. -
Step 3
Turn the dough out onto a lightly floured surface and knead for 8-10 minutes until smooth and elastic. -
Step 4
Place the dough in a lightly oiled bowl, cover with plastic wrap or a damp cloth, and let rise in a warm place for 1-2 hours, or until doubled in size. -
Step 5
Punch down the dough and shape it into a loaf. Place in a greased loaf pan. -
Step 6
Cover and let rise for another 30-60 minutes. -
Step 7
Preheat oven to 375°F (190°C). Bake for 30-35 minutes, or until the crust is golden brown and the internal temperature reaches 200°F (93°C).
Important Information
Nutrition Facts (Per Serving)
It is important to consider this information as approximate and not to use it as definitive health advice.
Allergy Information
Please check ingredients for potential allergens and consult a health professional if in doubt.