Best Deviled Eggs – Easy Classic Recipe
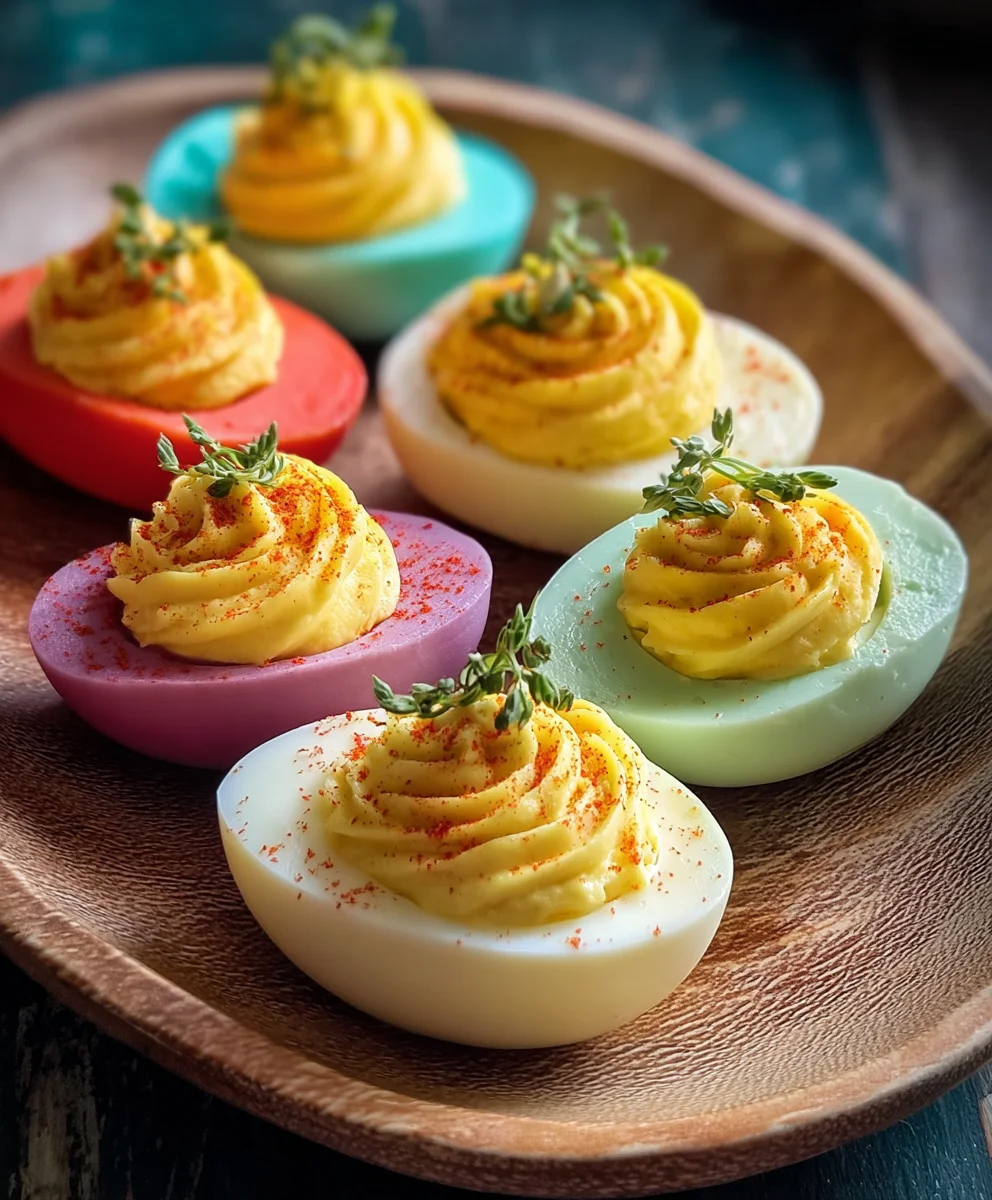
Deviled eggs are a quintessential party appetizer, a beloved classic that brings smiles to faces at every gathering. There’s a certain nostalgic charm about these creamy, tangy delights, isn’t there? They’re incredibly versatile, easily dressed up or down, making them perfect for everything from a casual backyard barbecue to a more formal holiday spread. What truly makes deviled eggs so special is their deceptively simple elegance. The perfect balance of rich, velvety yolk filling against the slightly firm egg white is incredibly satisfying. They offer a burst of flavor that’s both comforting and exciting, leaving guests reaching for just one more. This recipe elevates the classic deviled egg with a few thoughtful touches that will make your versions the star of the snack table.
Ingredients:
- 6 Large eggs
- 1/4 tsp kosher salt (table salt is fine but use less)
- 2 1/2 tbsp Miracle Whip
- 1 tsp Apple cider vinegar
- 1 tsp Yellow mustard
- 1/4 tsp Granulated sugar
- 2 tbsp Sweet Relish
- A dash of black pepper (optional)
- Paprika and chives for garnish (optional)
Preparing the Eggs
The foundation of any great deviled egg recipe lies in perfectly cooked eggs. We want that yolk to be firm but not dry, and the whites to be tender and easy to slice. To achieve this, we’ll start by placing our 6 large eggs into a medium saucepan. Ensure they are in a single layer at the bottom of the pan. Add enough cold water to cover the eggs by about an inch. This initial cold water bath is crucial because it prevents the eggs from cracking due to sudden temperature shock. Place the saucepan over medium-high heat and bring the water to a rolling boil.
Once the water reaches a vigorous boil, immediately remove the saucepan from the heat. Cover the pan tightly with a lid and let the eggs sit in the hot water for 10 to 12 minutes. This method, known as “steam peeling,” is a fantastic way to ensure the eggs cook evenly and, more importantly, make them easier to peel later on. While the eggs are resting, prepare an ice bath. Fill a medium bowl with cold water and add a generous amount of ice cubes. This ice bath will stop the cooking process instantly, preventing the yolks from developing that unappealing grey ring and making the peeling process a breeze. After the 10 to 12 minutes have passed, carefully use a slotted spoon to transfer the hot eggs directly into the prepared ice bath. Let them chill for at least 10 minutes, or until they are completely cool to the touch.
Shelling and Halving
Once your eggs are thoroughly chilled, it’s time for the satisfying (and sometimes frustrating!) task of peeling them. Gently tap each egg on a hard surface, like your countertop, to crack the shell all around. Then, starting from the wider end of the egg (where the air pocket usually is), carefully begin extract to peel away the shell. The ice bath should have made the membrane underneath the shell slippery, allowing the shell to come off in large pieces. If you encounter a stubborn spot, don’t worry! You can run the egg under cool running water as you peel, which often helps loosen the shell.
After all 6 eggs have been successfully peeled, rinse them under cool water to remove any lingering shell fragments. Pat them dry gently with a paper towel. Now, we’ll slice them in half lengthwise. For the cleanest cut, use a sharp knife and steady hand. Place each egg on a cutting board and slice it directly down the middle, from end to end. You’ll be left with 12 perfect halves, each containing a vibrant yellow yolk nestled in its white cradle. Be sure to arrange the egg white halves on a serving platter, cupped side up, ready to be filled with our delicious deviled egg mixture. You can also gently scoop out the yolks into a separate bowl for the next step; this makes it easier to mash them thoroughly.
Crafting the Creamy Filling
This is where the magic happens! In a medium bowl, carefully scoop out the cooked yolks from the halved egg whites. It’s important to get all of them, as they are the heart of our deviled egg filling. Using a fork or a potato masher, vigorously mash the yolks until they are as fine and crum extractbly as possible. We want to eliminate any large lumps for a super smooth and luxurious filling. This mashing step is crucial for achieving that classic deviled egg texture.
Next, it’s time to add our creamy binder. Measure out 2 1/2 tablespoons of Miracle Whip and add it to the mashed yolks. The Miracle Whip provides a wondegin extractl tanginess and creamy consistency that is characteristic of this beloved appetizer. Now, add the 1 teaspoon of yellow mustard. The mustard adds a bit of zesty flavor and a lovely yellow hue to the filling. Next, measure in 1 teaspoon of apple cider vinegar. The vinegar brings a subtle acidity that balances the richness of the yolks and Miracle Whip, brightening the overall flavor profile. For a touch of sweetness, add 1/4 teaspoon of granulated sugar. Don’t underestimate the power of this small addition; it rounds out the flavors beautifully. Finally, stir in 2 tablespoons of sweet relish. The relish adds pops of sweetness and a delightful texture to the filling, making each bite interesting and delicious.
Seasoning and Piping
Now that all our core ingredients are in the bowl, it’s time to mix and season. Stir everything together thoroughly until you have a smooth, homogenous mixture. You want to ensure that all the ingredients are well combined and that there are no streaks of yolk or any of the binders showing. Taste the mixture at this point. Does it need a touch more salt? A little more tang? This is your chance to adjust the flavors to your preference. Add the 1/4 teaspoon of kosher salt. If you’re using table salt, remember to use less, as it’s more potent. You can also add a dash of black pepper at this stage if you like a little warmth. Mix again until everything is perfectly incorporated. The goal is a creamy, flavorful filling that is slightly tangy, a little sweet, and perfectly seasoned.
Once your filling is to your liking, it’s time to get it back into those egg white halves. You have a couple of options here, depending on your desired presentation and kitchen tools. For a classic, neat look, transfer the deviled egg filling into a piping bag fitted with a star tip. This allows you to create beautiful, ruffled swirls of filling into each egg white half. If you don’t have a piping bag, don’t fret! You can also use a small spoon to carefully dollop the filling into each egg white. Alternatively, you can use a zip-top bag with a corner snipped off as a makeshift piping bag. Whichever method you choose, fill each egg white half generously, creating a nice mound of creamy goodness.
Garnishing and Serving
The final flourish to our deviled eggs is the garnish! This is where you can add a pop of color and an extra layer of flavor. If you have paprika and chives on hand and choose to use them, now is the time. Sprinkle a light dusting of paprika over the top of each filled deviled egg. The paprika adds a beautiful reddish hue and a very subtle smoky flavor. For an extra touch of freshness and visual appeal, finely chop some fresh chives and sprinkle them over the paprika. The bright green of the chives provides a lovely contrast to the creamy filling and the red paprika.
Arrange the finished deviled eggs on your serving platter. They look absolutely stunning and are sure to be a hit at any gathering, from casual picnics to more formal parties. For the best flavor and texture, it’s recommended to serve them chilled or at room temperature. They are best enjoyed within a day or two of making them, as the filling can start to dry out or the whites can become a bit watery if stored for too long. Make sure to cover the platter tightly with plastic wrap before refrigerating them to keep them fresh. Enjoy these classic and delicious deviled eggs!

Conclusion:
There you have it – a delightful and easy-to-follow guide to crafting the perfect Deviled Eggs! We’ve covered the essential steps from boiling your eggs to achieving that creamy, flavorful filling. These classic appetizers are sure to be a hit at any gathering, from casual brunches to more formal parties. Don’t be afraid to experiment with the suggested variations to make them your own. Remember, the key to amazing Deviled Eggs lies in the quality of your ingredients and a little bit of love in the preparation. So go ahead, whip up a batch and watch them disappear!
For serving, consider presenting your Deviled Eggs on a beautiful platter, perhaps garnished with a sprinkle of paprika or fresh chives for an extra pop of color and flavor. They pair wonderfully with other finger foods and are a staple at picnics and potlucks.
Frequently Asked Questions about Deviled Eggs:
Q: How can I make my Deviled Eggs extra creamy?
A: To achieve an extra creamy filling for your Deviled Eggs, ensure you mash the egg yolks thoroughly until they are very smooth. Adding a little extra mayonnaise or a touch of sour cream can also contribute to a richer, creamier texture. Some people even add a splash of milk or cream.
Q: What are some other popular variations for Deviled Eggs?
A: The possibilities for Deviled Eggs are endless! Popular variations include adding a dash of hot sauce for a kick, incorporating finely chopped pickles or relish for tang, or mixing in crispy beef bacon bits for a savory crunch. You can also experiment with different spices like curry powder or smoked paprika, or even add a touch of Dijon mustard for a subtle bite.
Q: How far in advance can I prepare Deviled Eggs?
A: You can prepare the egg yolk filling for your Deviled Eggs up to two days in advance and store it in an airtight container in the refrigerator. The hard-boiled egg white halves can also be stored separately in the refrigerator for up to a day. It’s best to assemble the Deviled Eggs a few hours before serving to prevent the whites from becoming soggy.
Best Deviled Eggs – Easy Classic Recipe
A simple and classic recipe for perfectly creamy and tangy deviled eggs, ideal for any occasion.
Ingredients
-
6 Large eggs
-
1/4 tsp kosher salt
-
2 1/2 tbsp Miracle Whip
-
1 tsp Apple cider vinegar
-
1 tsp Yellow mustard
-
1/4 tsp Granulated sugar
-
2 tbsp Sweet Relish
-
A dash of black pepper (optional)
-
Paprika for garnish (optional)
-
Chives for garnish (optional)
Instructions
-
Step 1
Place eggs in a saucepan, cover with cold water by 1 inch. Bring to a rolling boil over medium-high heat. Once boiling, remove from heat, cover, and let sit for 10-12 minutes. Prepare an ice bath. Transfer eggs to the ice bath and chill for at least 10 minutes. -
Step 2
Gently tap cooled eggs to crack the shell all around. Peel the shells, starting from the wider end. Rinse under cool water to remove fragments and pat dry. Slice each egg in half lengthwise and arrange white halves on a platter, cupped side up. Scoop yolks into a separate bowl. -
Step 3
Vigorously mash the egg yolks with a fork or potato masher until very fine and crumbly. -
Step 4
Add Miracle Whip, yellow mustard, apple cider vinegar, granulated sugar, and sweet relish to the mashed yolks. Stir until well combined. -
Step 5
Season the filling with kosher salt and black pepper (if using). Stir thoroughly until smooth and homogenous. Taste and adjust seasonings as needed. -
Step 6
Transfer the filling to a piping bag with a star tip, or use a spoon or zip-top bag to fill each egg white half generously. -
Step 7
Garnish with a dusting of paprika and finely chopped chives, if desired. Arrange on a serving platter and serve chilled or at room temperature.
Important Information
Nutrition Facts (Per Serving)
It is important to consider this information as approximate and not to use it as definitive health advice.
Allergy Information
Please check ingredients for potential allergens and consult a health professional if in doubt.