Crispy Cottage Cheese Chips – Easy Healthy Snack
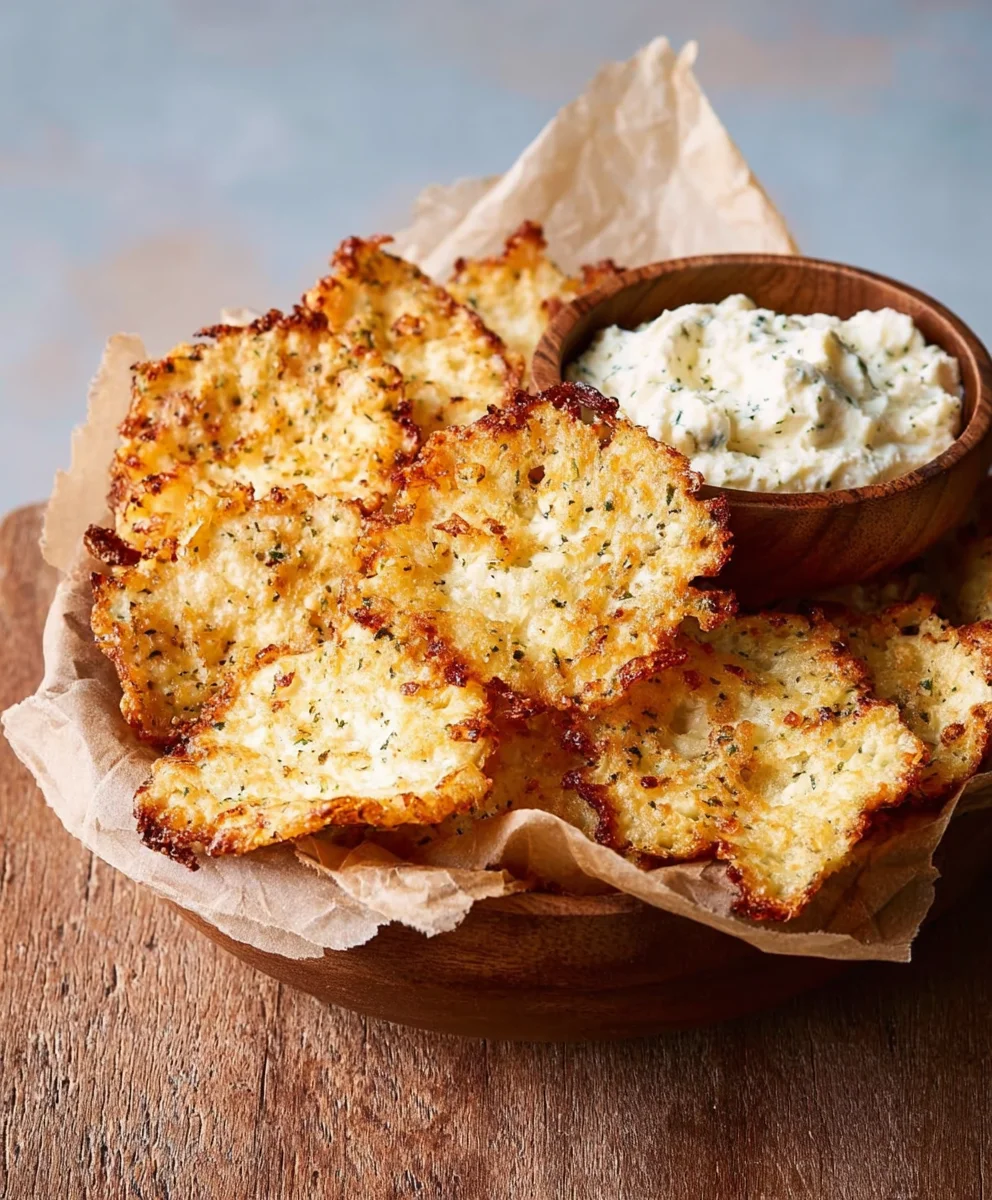
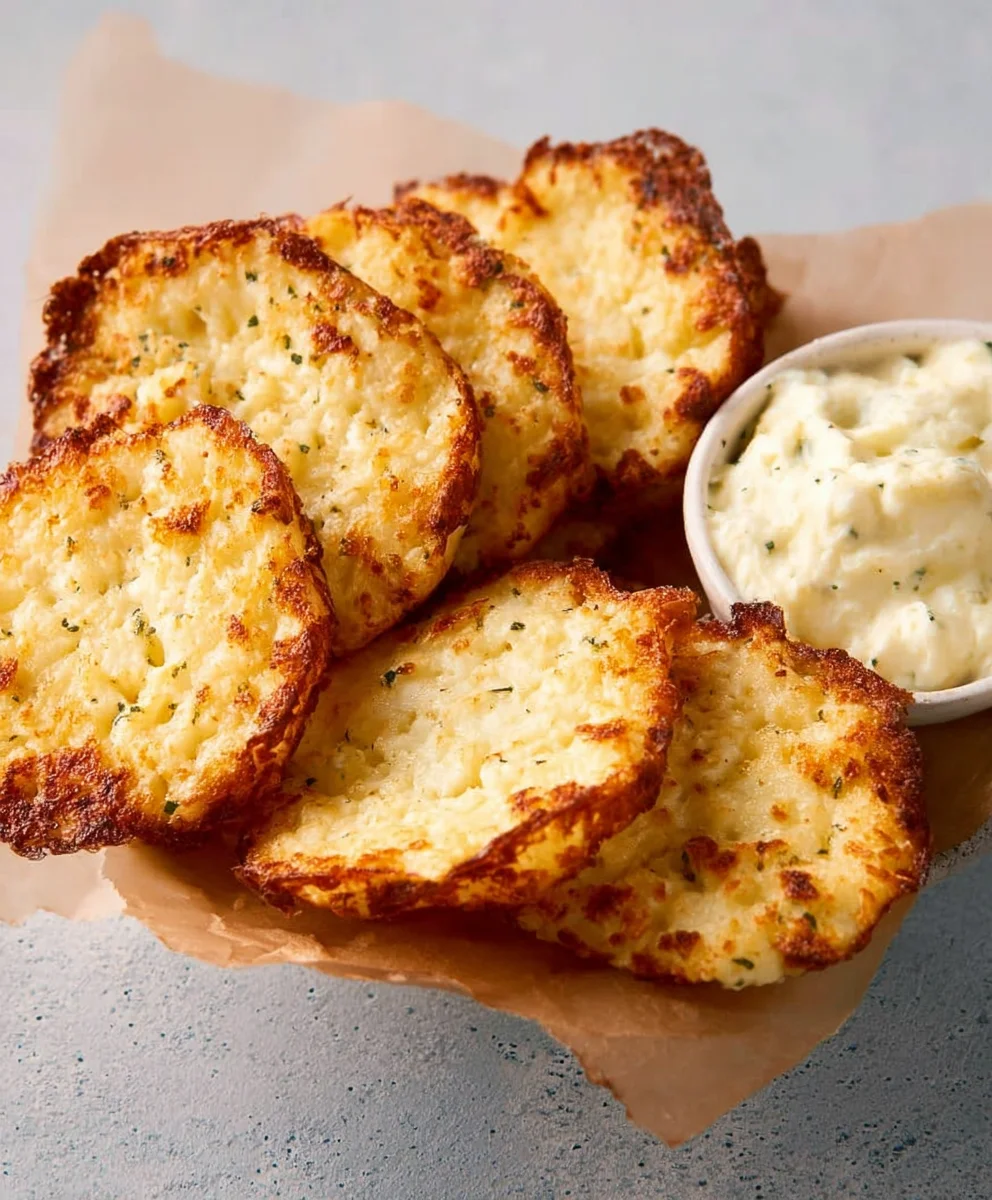
Crispy Cottage Cheese Chips are about to become your new go-to snack obsession. Forget those bland, store-bought crackers; we’re talking about a guilt-free indulgence that delivers an incredible crunch and a satisfyingly savory flavor profile. You’re probably wondering, “Cottage cheese? For chips?” Absolutely! The magic lies in how this humble dairy staple transforms into impossibly light and airy delights when baked. People love these Crispy Cottage Cheese Chips because they offer a fantastic way to enjoy a satisfying snack without the heavy feeling, making them perfect for a mid-afternoon pick-me-up, a healthy party appetizer, or even a delightful addition to your favorite dips and spreads. What makes them truly special is their versatility – you can customize them with your favorite herbs and spices, turning a simple snack into a culinary adventure. Get ready to impress yourself and everyone around you with this surprisingly simple yet utterly delicious recipe.
Ingredients:
- 1 cup cottage cheese (small curds, drained)
- ¼ teaspoon garlic powder
- ¼ teaspoon onion powder
- ½ teaspoon dried herbs (optional, like thyme or parsley)
- Salt and pepper to taste
- Olive oil spray
Making Your Crispy Cottage Cheese Chips
This recipe for Crispy Cottage Cheese Chips is incredibly simple and remarkably versatile. The base is, of course, cottage cheese, but don’t let that fool you into thinking these will be soft or bland. With a few simple steps and a little heat, you’ll transform humble cottage cheese into delightfully crunchy, savory bites that are perfect for snacking, dipping, or even crum extractbling over salads. We’re going to focus on getting that satisfying crunch and infusing them with a delicious savory flavor.
Preparation and Seasoning
The first crucial step is ensuring your cottage cheese is well-drained. Excess moisture is the enemy of crispiness! I find that placing the cottage cheese in a fine-mesh sieve set over a bowl for about 15-30 minutes is usually sufficient. You can gently press down on the curds with a spoon to help encourage the whey to drain out. Once drained, transfer the cottage cheese to a medium-sized mixing bowl.
Now it’s time to add our flavor enhancers. Sprinkle in the garlic powder and onion powder. These two are foundational for a savory chip. If you’re feeling a little adventurous, this is also where you’ll add your dried herbs. Thyme, parsley, chives, or even a pinch of dried dill can work wonderfully. For this batch, I’m sticking with a simple blend of dried parsley and thyme for a classic herbaceous note. Next, season generously with salt and freshly ground black pepper. Remember that cottage cheese itself has a mild flavor, so don’t be shy with the seasonings. Taste a tiny bit of the seasoned mixture at this point (before it’s cooked, of course!) to gauge the saltiness and adjust if necessary. Once all the seasonings are added, stir everything together very thoroughly. You want to ensure the spices and salt are evenly distributed throughout the cottage cheese mixture. This even distribution is key to consistent flavor in every chip.
Forming and Baking Your Chips
Preheat your oven to a moderate 375°F (190°C). This temperature is hot enough to encourage crisping without burning the chips too quickly. Prepare two baking sheets by lining them with parchment paper. Parchment paper is your best friend here, as it prevents sticking and makes cleanup a breeze.
Now, for forming the chips. You’ll need a spoon for this. Take about a tablespoon of the seasoned cottage cheese mixture and drop it onto the prepared baking sheet. Then, using the back of the spoon, gently spread the cottage cheese into a thin, even circle or oval shape. Aim for a thickness of about ¼ inch. Thinner chips will be crispier, so try to keep them as uniform as possible. Leave a little space between each chip on the baking sheet, as they may spread slightly during baking. Repeat this process with the remaining cottage cheese mixture, filling your baking sheets. Don’t overcrowd the sheets; it’s better to use two sheets than to cram them all onto one, as this can lead to uneven cooking.
The Crucial Baking Phase
Place one baking sheet into the preheated oven. Bake for approximately 15 to 20 minutes. The exact baking time will depend on how thin you’ve made your chips and the specific oven you’re using. Keep a close eye on them, especially as they get towards the end of the baking time. You’re looking for them to become golden brown around the edges and slightly puffed. They should appear dry and firm. If some chips are browning faster than others, you can carefully rotate the baking sheet halfway through the baking time.
Once the chips look golden and are starting to crisp up, carefully remove the baking sheet from the oven. At this point, you might notice some areas are crispier than others. This is a good time to carefully flip each chip using a thin spatula or even the back of a fork. This flipping step is crucial for ensuring that both sides of the chip get wonderfully crispy and evenly browned. Return the baking sheet to the oven for another 5 to 10 minutes, or until the flipped side is also golden brown and the chips feel firm to the touch. You can gently tap one to test for crispness. If they still feel a bit soft, give them a few more minutes.
Cooling for Maximum Crispness
This is a stage where patience is rewarded. Once baked to your desired crispness, remove the baking sheets from the oven. Let the chips cool on the baking sheets for about 5 minutes. During this time, they will continue to firm up. After the initial cooling on the sheet, carefully transfer the Crispy Cottage Cheese Chips to a wire cooling rack. This allows air to circulate around them, which is essential for achieving and maintaining their maximum crispiness. If you leave them on the hot baking sheet, they can steam and become slightly soft again. Let them cool completely on the wire rack. They will become even more brittle and crunchy as they reach room temperature.
Once fully cooled, you’ll have wonderfully crispy, flavorful snacks. They are best enjoyed the same day they are made for the ultimate crunch, but you can store any leftovers in an airtight container at room temperature for a day or two. Just be aware that their crispness might diminish slightly over time. These Crispy Cottage Cheese Chips are a testament to how simple ingredients can be transformed into something truly delicious and satisfying with minimal effort. Enjoy experimenting with different herbs and spices to create your signature flavor!
Conclusion:
There you have it – your guide to creating perfectly Crispy Cottage Cheese Chips! We’ve walked through each step to ensure you achieve that delightful crunch and savory flavor that makes these chips so addictive. Remember, the key is in achieving the right moisture level and baking them until golden brown and firm. These Crispy Cottage Cheese Chips are incredibly versatile, offering a healthier alternative to traditional fried snacks. Enjoy them on their own as a light snack, crum extractbled over salads for added texture, or even as a base for mini appetizers. Don’t be afraid to experiment with different seasonings – smoked paprika, garlic powder, or even a sprinkle of chili flakes can transform these simple chips into something truly unique. So grab your cottage cheese, get baking, and impress yourself and your loved ones with this delicious and easy recipe!
Frequently Asked Questions about Crispy Cottage Cheese Chips:
Q: How can I make my Crispy Cottage Cheese Chips even crispier?
A: The crispiness of your Crispy Cottage Cheese Chips is directly related to how much moisture is removed. Ensure you drain your cottage cheese very well before blending. During baking, if they aren’t as crisp as you’d like, you can pop them back into the oven for an additional 5-10 minutes at a slightly lower temperature, watching them closely to prevent burning. Spreading them out in a single layer on the baking sheet also promotes even drying and crisping.
Q: Can I use flavored cottage cheese for this recipe?
A: While you can experiment with flavored cottage cheese, it’s generally recommended to use plain, unflavored cottage cheese for the base of your Crispy Cottage Cheese Chips. This allows you to control the flavor profile completely with your own seasonings. If you do choose to use flavored cottage cheese, be mindful of the existing flavor and salt content, and adjust your added seasonings accordingly.
Crispy Cottage Cheese Chips
Incredibly simple and remarkably versatile cottage cheese chips that transform humble cottage cheese into delightfully crunchy, savory bites.
Ingredients
-
1 cup cottage cheese (small curds, drained)
-
1/4 teaspoon garlic powder
-
1/4 teaspoon onion powder
-
1/2 teaspoon dried herbs (optional, like thyme or parsley)
-
Salt to taste
-
Pepper to taste
-
Olive oil spray
Instructions
-
Step 1
Ensure cottage cheese is well-drained by placing it in a fine-mesh sieve for 15-30 minutes. Gently press to remove excess whey. Transfer drained cottage cheese to a mixing bowl. -
Step 2
Add garlic powder, onion powder, dried herbs (if using), salt, and pepper to the cottage cheese. Stir thoroughly to ensure even distribution of seasonings. Taste and adjust seasonings if necessary. -
Step 3
Preheat oven to 375°F (190°C). Line two baking sheets with parchment paper. -
Step 4
Drop about a tablespoon of the seasoned cottage cheese mixture onto the prepared baking sheets. Use the back of a spoon to spread each portion into a thin, even circle or oval shape, about 1/4 inch thick. Leave space between chips. -
Step 5
Bake for 15-20 minutes, or until golden brown around the edges and appearing dry and firm. Rotate the baking sheet halfway through if needed for even browning. -
Step 6
Carefully flip each chip with a spatula or fork. Return to the oven for another 5-10 minutes, until the flipped side is golden brown and chips are firm. -
Step 7
Remove baking sheets from the oven. Let chips cool on the sheets for 5 minutes, then transfer to a wire cooling rack to cool completely for maximum crispness.
Important Information
Nutrition Facts (Per Serving)
It is important to consider this information as approximate and not to use it as definitive health advice.
Allergy Information
Please check ingredients for potential allergens and consult a health professional if in doubt.